A Truly Classic Baked Cheesecake
For anyone who has ever felt daunted by the prospect of a baked cheesecake, this recipe is for you. It's a truly reliable method for achieving a perfectly smooth, creamy, and utterly delicious result every time.
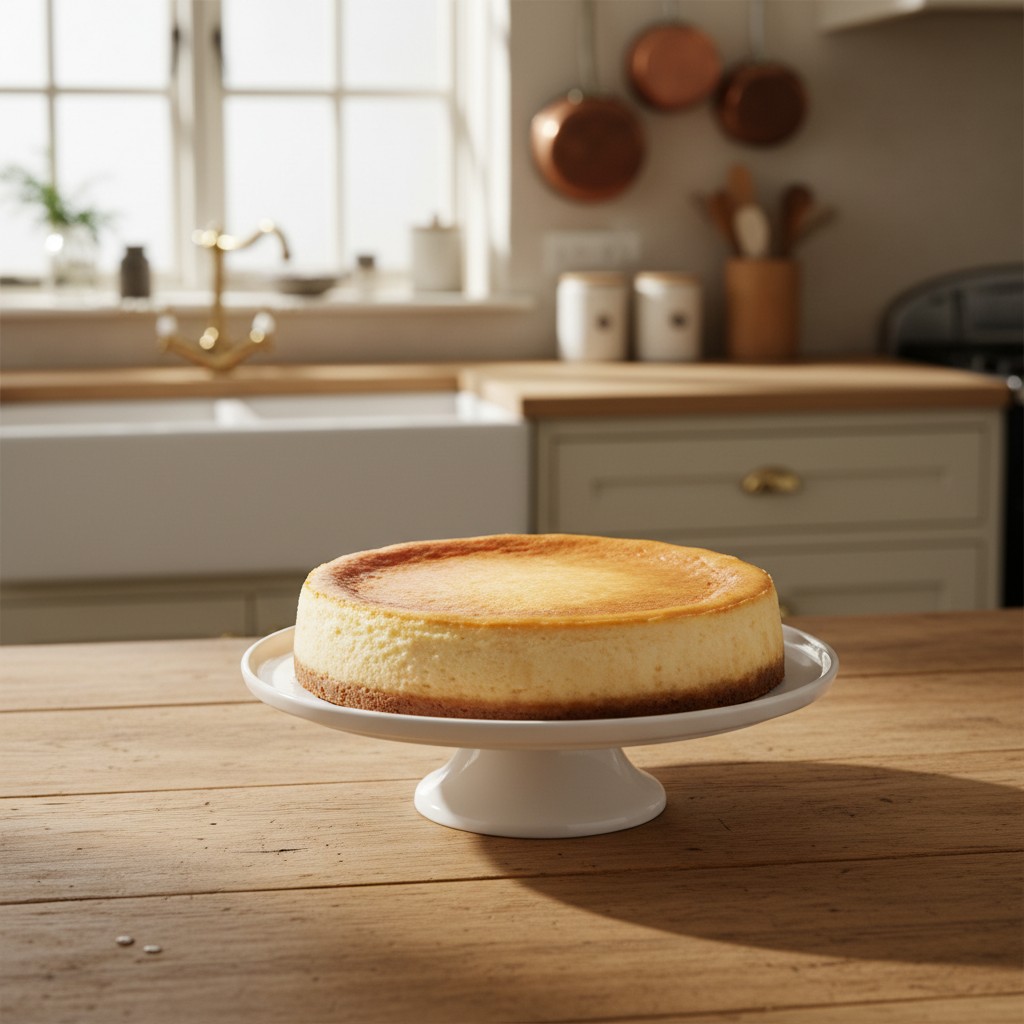
There are few desserts that inspire as much quiet apprehension in the home cook as a baked cheesecake. The tales of woe are legendary – cavernous cracks, a curdled texture, or a soggy base. But I am here to tell you that a perfect, gloriously smooth, and deeply creamy cheesecake is not only possible, it is entirely achievable in your own kitchen.
The secret, as is so often the case in cooking, lies not in some arcane magic, but in good ingredients and sound technique. We will use full-fat everything – this is not the time for corner-cutting – and we will treat the ingredients with respect. Most importantly, we will employ a water bath, a simple trick that creates a gentle, steamy environment for the cheesecake to bake, ensuring it cooks evenly from the edge to the very centre.
This recipe is the culmination of much testing and is, I believe, the definitive method. Follow the steps precisely, resist the temptation to peek in the oven, and be patient during the all-important cooling phase. Do this, and you will be rewarded with a dessert of sublime texture and flavour, a true centrepiece for any occasion.
Why You'll Love This Recipe
- The water bath (bain-marie) is non-negotiable; it creates a steamy, humid environment that ensures the cheesecake bakes gently and evenly, preventing the dreaded crack down the centre.
- Using all ingredients at room temperature is paramount. This allows them to combine smoothly, preventing a lumpy batter and contributing to a silky, homogenous texture.
- A slow, gradual cooling process—first in the turned-off oven, then on the countertop—is the final secret. It prevents the shock of a sudden temperature change, which is another common cause of cracking.
Ingredients
- For the base:
- 250g digestive biscuits
- 125g unsalted butter, melted
- For the filling:
- 900g full-fat cream cheese, at room temperature
- 250g caster sugar
- 200ml soured cream, at room temperature
- 3 large free-range eggs, plus 1 extra egg yolk, at room temperature
- 1 tbsp lemon juice
- 1 tsp pure vanilla extract
- A pinch of salt
Equipment Needed
23cm (9-inch) springform cake tin · Large, deep roasting tin (for the water bath) · Strong aluminium foil · Food processor or rolling pin and a plastic bag · Electric hand mixer or stand mixer · Spatula · Kettle
Step-by-Step Instructions
- Begin by preheating your oven to 160°C (140°C Fan, Gas Mark 3). You will need a 23cm (9-inch) springform cake tin. To prepare it for the water bath, wrap the outside of the tin's base and sides securely with two or three layers of strong aluminium foil. This is crucial to prevent any water from seeping in.
- Now for the base. Crush the digestive biscuits to a fine crumb. The easiest way is in a food processor, but placing them in a sealed bag and bashing with a rolling pin is just as effective and rather therapeutic. Tip the crumbs into a bowl and pour over the melted butter. Mix thoroughly until the crumbs are evenly coated and resemble wet sand.
- Tip the buttery crumbs into the prepared springform tin. Using the back of a spoon or the base of a glass, press the crumbs down firmly and evenly across the bottom and slightly up the sides of the tin. Place the tin in the fridge to chill and firm up while you make the filling.
- For the filling, it is vital that your cream cheese, soured cream, and eggs are at room temperature. In a large bowl, using an electric hand mixer on a low speed, beat the cream cheese until it is completely smooth and free of lumps. Scrape down the sides of the bowl frequently.
- Gradually add the caster sugar and salt, beating on low speed until just combined. You do not want to incorporate too much air. Add the eggs and the extra yolk one at a time, mixing gently after each addition until it has just disappeared into the batter. Again, scrape down the bowl.
- Finally, gently stir in the soured cream, lemon juice, and vanilla extract with a spatula until the mixture is smooth and homogenous. Pour the filling over the chilled biscuit base in the prepared tin.
- Place the springform tin into a large, deep roasting tray. Carefully pour freshly boiled water from a kettle into the roasting tray, so that it comes about halfway up the sides of the cake tin. Be very careful not to splash any water onto the cheesecake filling.
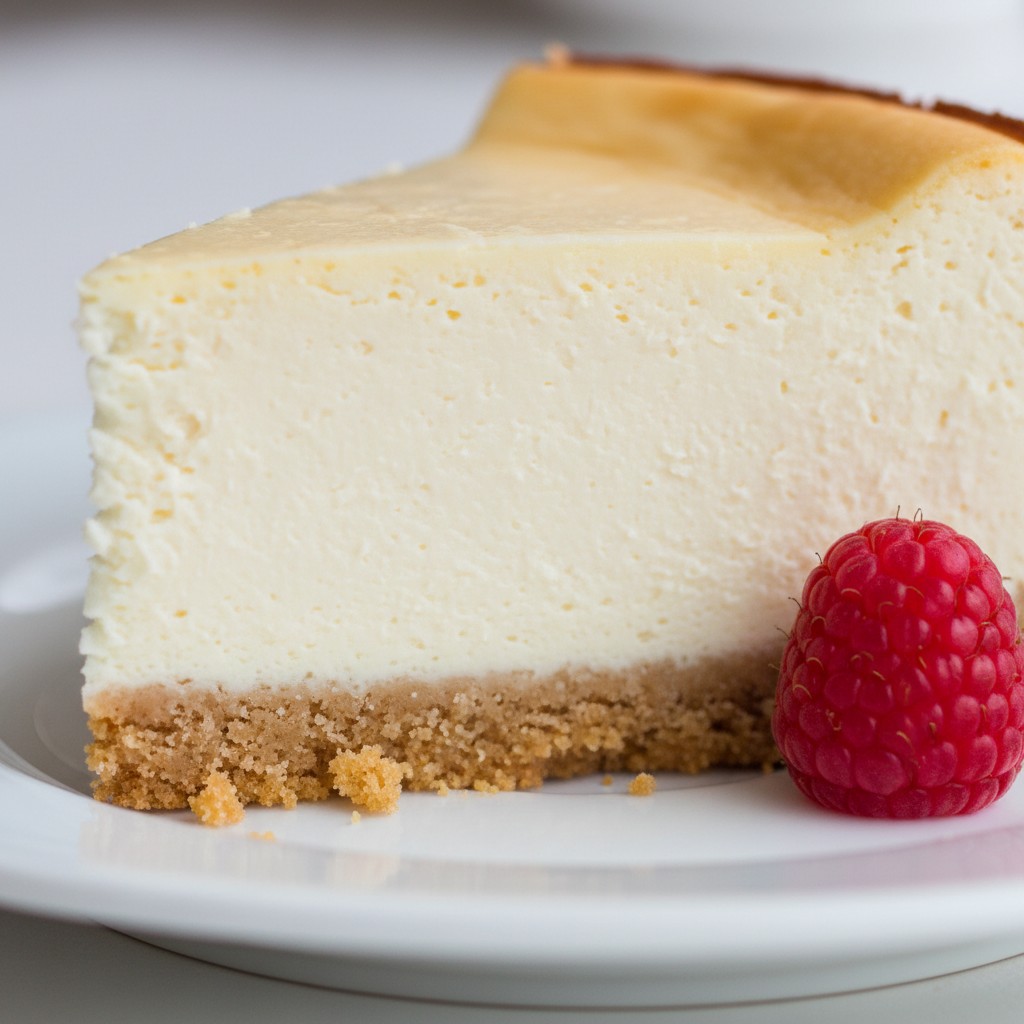
- Bake for 1 hour and 15 minutes. The cheesecake should be set around the edges but still have a distinct wobble in the centre (about a 2-inch circle) when you gently nudge the tin. Do not be tempted to overbake it.
- Now for the crucial cooling stage. Turn off the oven, prop the oven door open slightly with a wooden spoon, and leave the cheesecake to cool in the oven for at least 1 hour. This slow, gentle cooling is the key to preventing cracks.
- Remove the roasting tin from the oven. Carefully lift the cheesecake tin out of the water bath and remove the foil wrapping. Let the cheesecake cool completely to room temperature on a wire rack. This will take another couple of hours.
- Once completely cool, cover loosely with cling film and transfer to the refrigerator to chill for at least 6 hours, or preferably overnight, before serving. To serve, run a thin, sharp knife around the edge before releasing the springform clip.
Delia's Notes from the Kitchen
I must insist you follow the cooling instructions to the letter. It may seem a faff, but patience is the secret ingredient here, and it is the difference between a good cheesecake and a perfect one. The gradual cooling prevents the shock that causes cracks. Trust the process, and you will be rewarded handsomely.
How to Store & Reheat
The cheesecake must be stored in the refrigerator, covered loosely with cling film or in an airtight container. It will keep beautifully for up to 4 days. It is best served chilled, directly from the fridge, so no reheating is required.
Frequently Asked Questions
Why did my cheesecake crack?
The most common culprits are over-mixing the batter (which incorporates too much air), over-baking, or cooling it too quickly. The water bath and slow cooling process in this recipe are specifically designed to prevent this. Follow them to the letter!
Can I use low-fat cream cheese?
I really must advise against it. Full-fat cream cheese is essential for the rich flavour and, more importantly, the dense, creamy structure of a baked cheesecake. Low-fat versions have a higher water content and can result in a grainy, weeping texture.
How do I know when the cheesecake is cooked?
The key is the 'wobble'. The outer edges should look set and matte, but the very centre (a circle about 2 inches across) should still jiggle like a soft jelly when you gently shake the tin. It will continue to set as it cools.
Can I freeze this cheesecake?
Yes, it freezes remarkably well. Once completely chilled, you can freeze it whole or in slices. Wrap it tightly in cling film and then a layer of foil. It will keep for up to a month. Thaw overnight in the refrigerator before serving.
My biscuit base is too crumbly. What went wrong?
This usually means either the crumbs weren't fine enough or there wasn't quite enough melted butter to bind them. It can also happen if you don't press the base down firmly enough into the tin before chilling.