The Definitive Baked Cheesecake
There is a certain magic to a truly perfect baked cheesecake, one that is creamy, rich, and utterly flawless. This is the definitive recipe to teach you how to achieve just that.
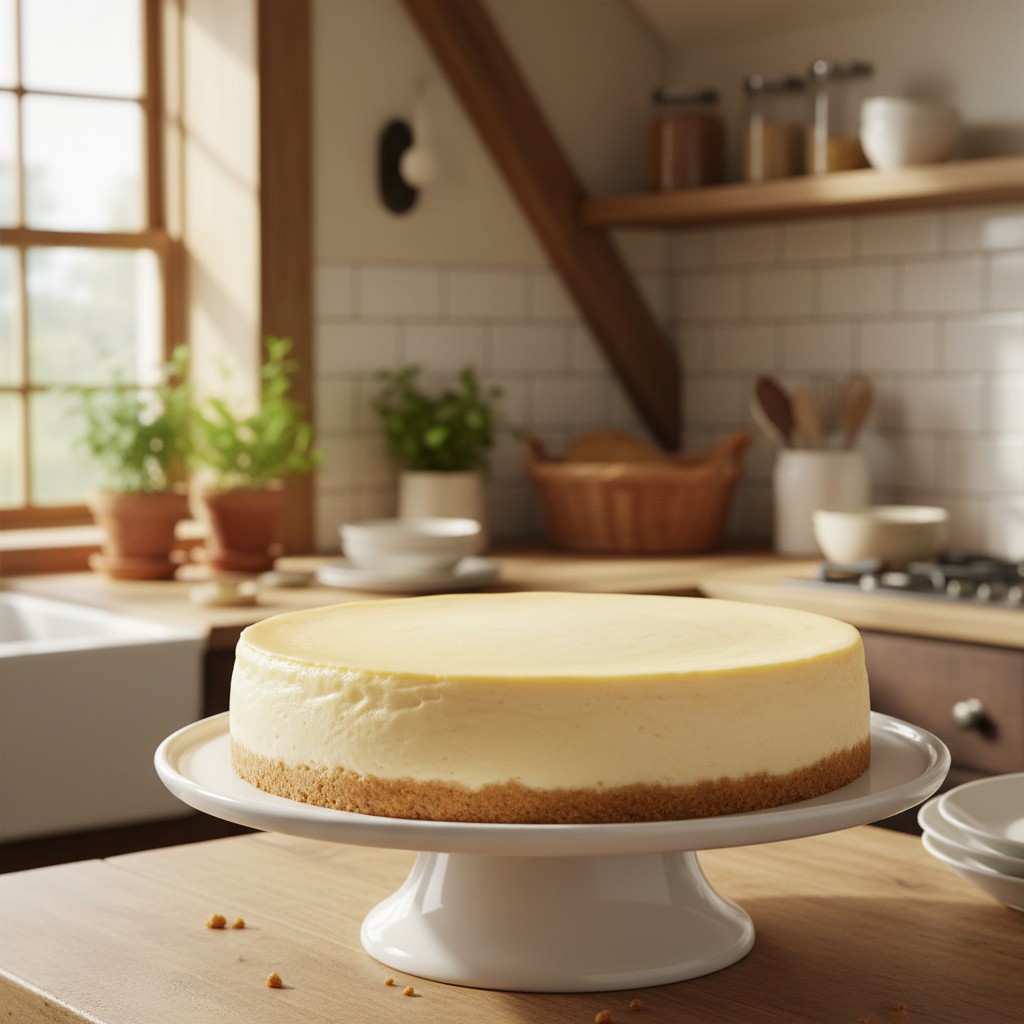
For many, the baked cheesecake represents the pinnacle of dessert-making, yet it is often approached with a certain amount of trepidation. Fears of cracks, curdled textures, and sunken middles are all too common. The purpose of this recipe, then, is not just to give you a list of instructions, but to demystify the process entirely and give you the confidence to produce a truly flawless, New York-style cheesecake in your own kitchen.
The secret, as is so often the case in baking, lies not in complexity but in technique and using the right ingredients. We will be employing a water bath, or bain-marie, which is the single most important element in achieving that coveted silky-smooth texture and unblemished surface. It ensures the cheesecake bakes in a humid, gentle heat, preventing it from drying out and cracking.
So, before you begin, take a deep breath and read through the method carefully. We will go step-by-step, explaining the 'why' behind each stage. With the right guidance, a perfect, creamy, and deeply satisfying cheesecake is not just possible, but entirely achievable.
Why You'll Love This Recipe
- The water bath (bain-marie) is non-negotiable; it creates a humid, steamy environment for gentle, even cooking, which is the secret to a crack-free top.
- Using all room temperature ingredients is crucial for a homogenous, lump-free batter. Cold cream cheese will simply not blend smoothly.
- A slow cool-down period inside the switched-off oven prevents the cheesecake from suffering a thermal shock, which is another primary cause of cracking.
Ingredients
- For the base:
- 250g digestive biscuits
- 125g unsalted butter, melted
- For the filling:
- 900g full-fat cream cheese (Philadelphia is ideal), at room temperature
- 250g caster sugar
- 3 tablespoons plain flour
- 1 teaspoon vanilla extract
- Zest of 1 lemon
- 3 large free-range eggs, plus 1 extra yolk, at room temperature
- 284ml carton soured cream, at room temperature
Equipment Needed
23cm (9-inch) springform cake tin · Large roasting tin (for the water bath) · Food processor or rolling pin and a plastic bag · Electric hand mixer or stand mixer · Heavy-duty aluminium foil · Baking parchment · Mixing bowls · Spatula
Step-by-Step Instructions
- Step 1: First, prepare the tin and oven. Preheat your oven to 160°C (140°C Fan, Gas Mark 3). You will need a 23cm (9-inch) springform cake tin. Grease the base and sides well, then line the base with a circle of baking parchment.
- Step 2: To make the base, crush the digestive biscuits to a fine crumb. You can do this in a food processor, or by placing them in a sealed plastic bag and crushing them with a rolling pin. Tip the crumbs into a bowl and pour over the melted butter, mixing until all the crumbs are moistened. Press this mixture firmly and evenly into the base of the prepared tin. Use the back of a spoon to get it really compact. Place the tin in the refrigerator to chill while you make the filling.
- Step 3: In a large bowl, using an electric hand mixer or a stand mixer with the paddle attachment, beat the room-temperature cream cheese on a low speed until it is completely smooth and free of lumps. This is a critical step, so take your time. Scrape down the sides of the bowl frequently.
- Step 4: In a separate, smaller bowl, whisk together the caster sugar and plain flour. Add this to the smooth cream cheese and beat on low speed until just combined. Do not over-beat from this point onwards, as incorporating too much air can cause cracking.
- Step 5: Add the vanilla extract and lemon zest, followed by the eggs and the extra yolk, one at a time, mixing on a low speed and waiting for each to be incorporated before adding the next. Finally, stir in the soured cream until the batter is smooth and homogenous.
- Step 6: Now, prepare the tin for its water bath. Take two large sheets of heavy-duty aluminium foil and place them on your work surface in a cross shape. Place the chilled springform tin in the centre and carefully wrap the foil up and around the sides of the tin, ensuring it is completely watertight. This will prevent any water from seeping into your cheesecake base.
- Step 7: Place the foil-wrapped tin into a large roasting tin. Pour the creamy filling over the chilled biscuit base and smooth the top with a spatula.
- Step 8: Place the roasting tin into the preheated oven. Carefully pour hot water (from a recently boiled kettle) into the roasting tin, so that it comes about halfway up the sides of the cake tin. Be careful not to splash any water into the cheesecake itself.
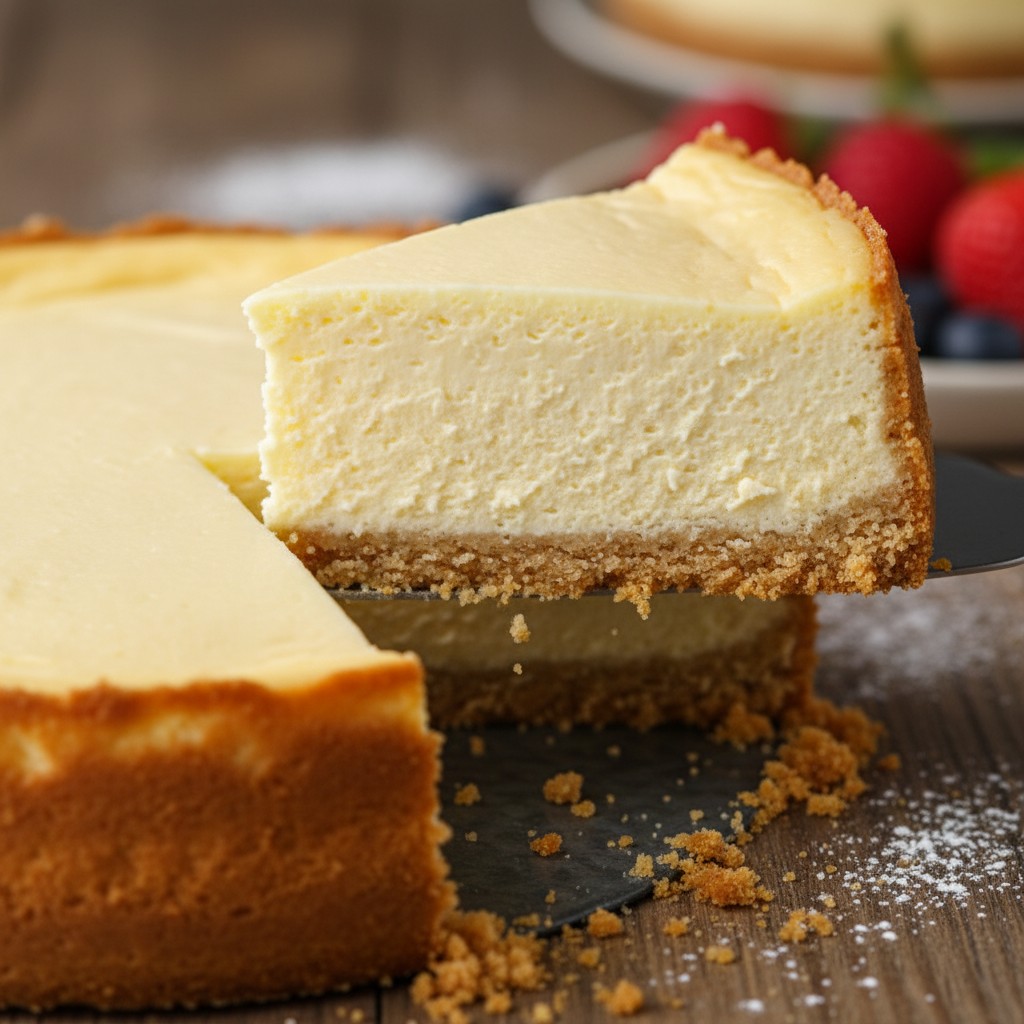
- Step 9: Bake for 1 hour and 30 minutes. The cheesecake is done when the edges are set but the centre still has a slight wobble when you gently shake the tin. Do not be tempted to over-bake.
- Step 10: Now for the crucial cooling stage. Turn off the oven completely, but DO NOT open the door. Let the cheesecake cool slowly in the oven for at least 1 hour. After an hour, you can prop the oven door open slightly with a wooden spoon and let it cool for another hour. This gradual cooling process is the final defence against cracks.
- Step 11: Remove the cheesecake from the oven and its water bath. Carefully peel away the foil. Let it cool to room temperature on a wire rack, then cover loosely with cling film and transfer to the refrigerator to chill for at least 6 hours, or preferably overnight, before serving.
Delia's Notes from the Kitchen
A note on cream cheese: Do not be tempted by anything other than the full-fat block variety. The spreadable kind sold in tubs contains more water and stabilisers, which will compromise the final texture. For this recipe, Philadelphia in its foil-wrapped block form is, and always has been, the gold standard for its consistent quality and flavour.
How to Store & Reheat
The cheesecake must be stored, well-covered with cling film or in an airtight container, in the refrigerator. It will keep beautifully for up to 5 days. It is best served chilled and does not require reheating. For the best flavour and texture, allow a slice to sit at room temperature for about 20 minutes before serving to take the hard chill off.
Frequently Asked Questions
Why did my cheesecake crack?
There are three main culprits for a cracked cheesecake. Firstly, over-beating the batter, which incorporates too much air. Secondly, not using a water bath, which leads to uneven, dry heat. And thirdly, cooling it too quickly, causing a 'thermal shock'. This recipe is designed to prevent all three.
Can I use low-fat cream cheese?
I'm afraid the answer is a firm no. The structure, creaminess, and flavour of a baked cheesecake rely entirely on the high fat content of full-fat block cream cheese. Low-fat or 'light' versions contain more water and stabilisers, which will result in a weeping, grainy, and disappointing texture.
How do I know for certain when the cheesecake is cooked?
The 'wobble test' is the most reliable indicator. The outer 2-3 inches of the cheesecake should look set and matte, but the very centre (a circle about the size of a 50p coin) should still have a distinct jiggle, like a set custard, when you gently nudge the tin. It will continue to set as it cools.
Is the water bath really necessary?
Yes, it is absolutely essential for a superior result. It provides a moist, steamy environment that allows the custard to set gently and evenly. It is the single best technique for preventing cracks and ensuring a divinely smooth and creamy texture.
My cheesecake batter is lumpy. What went wrong?
This almost always happens when the ingredients, particularly the cream cheese, are too cold. They must all be at room temperature to combine into a smooth emulsion. If your cream cheese is lumpy, you haven't beaten it enough at the start, or it was too cold to begin with.