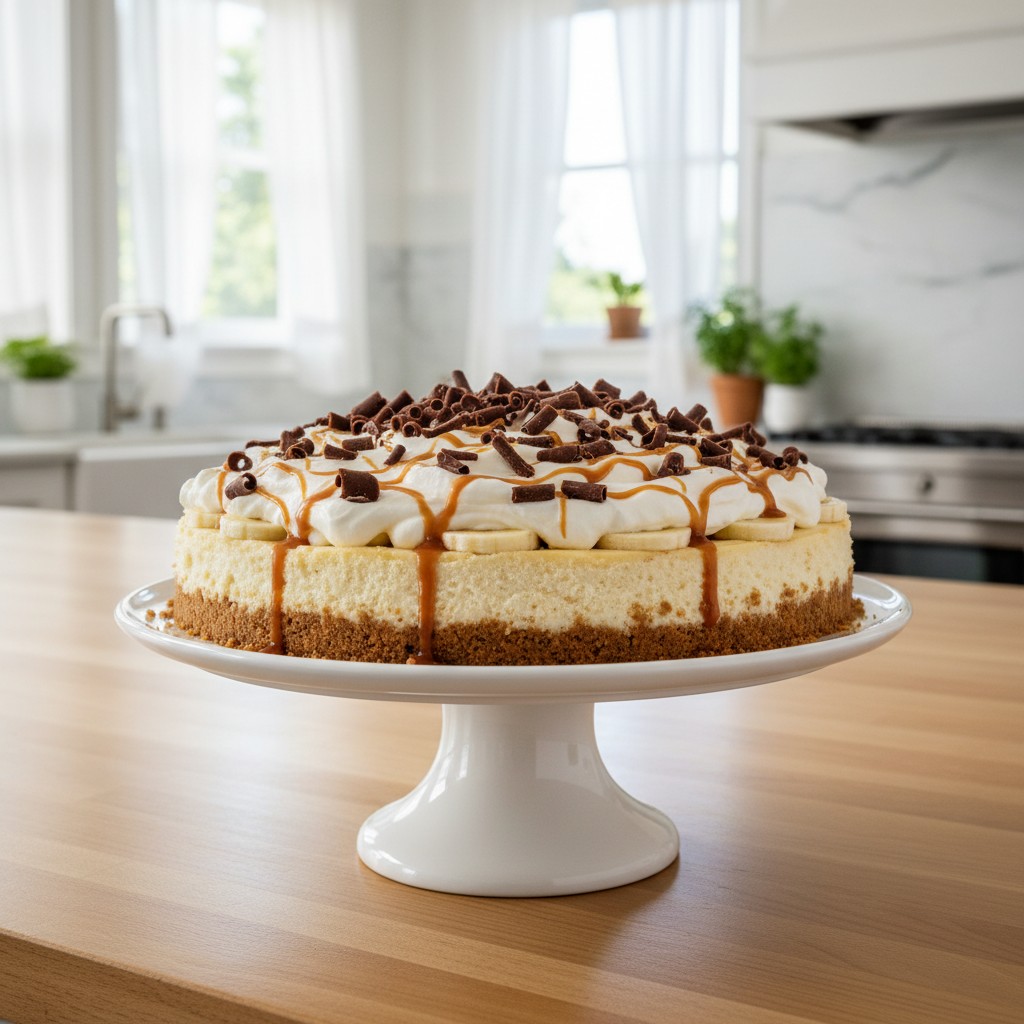
The Ultimate Banoffee Cheesecake
This is my definitive recipe for a showstopping Banoffee Cheesecake. It brings together the beloved flavours of banana and toffee with the creamiest of cheesecake fillings for a truly special dessert.
There are some culinary marriages that are simply meant to be, and banana with toffee is one of the happiest unions I know. While the classic Banoffee Pie holds a dear place in our hearts, this cheesecake version elevates the concept to something altogether more sophisticated, yet wonderfully straightforward to make.
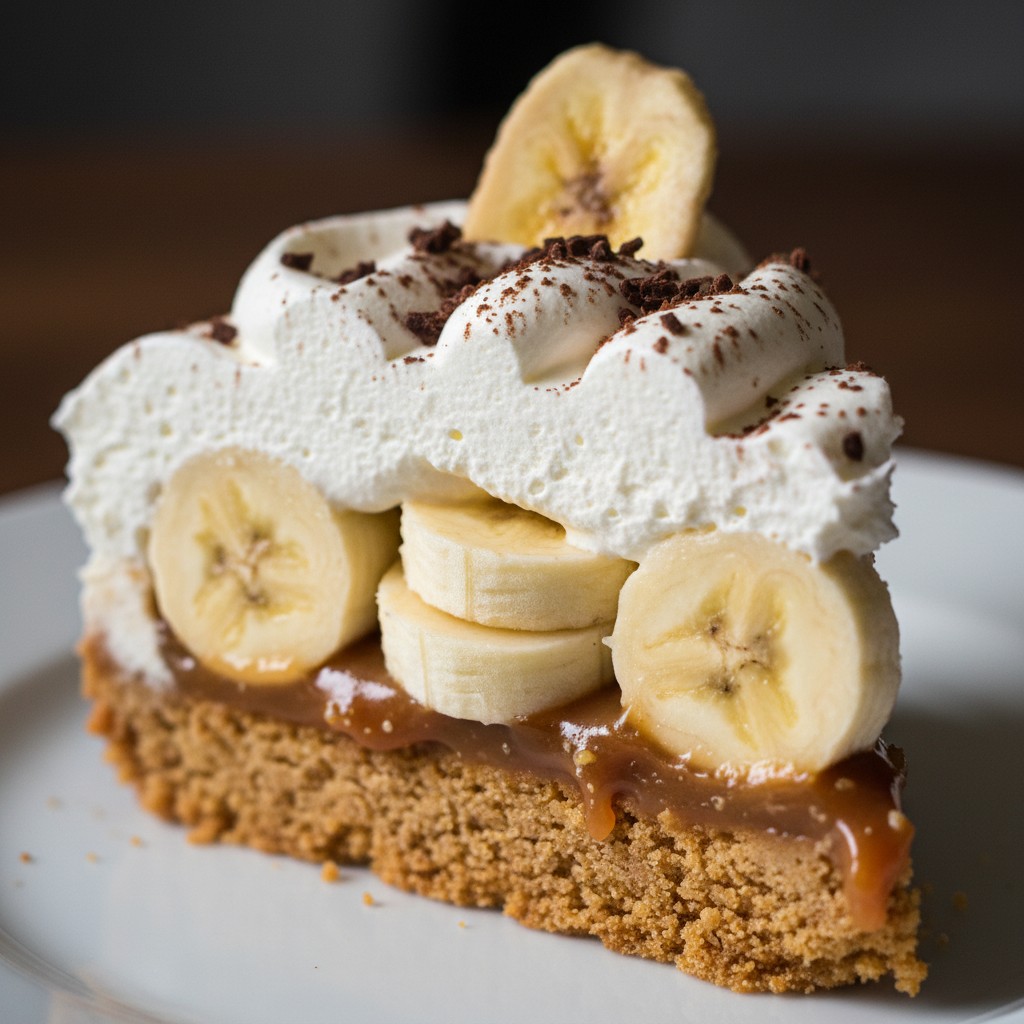
This is a no-bake cheesecake, which means its success relies entirely on the quality of its components and the care taken in assembly. There is no oven to hide behind here. Instead, we focus on creating three perfect layers: a crisp, buttery biscuit base; a rich, gooey, homemade caramel that is worlds away from anything you can buy; and a light-but-stable cream cheese topping that sets to a perfect, sliceable consistency.
What you have in the end is a dessert of contrasts. The crunch of the base, the soft fruit, the smooth, dense caramel, and the tangy lightness of the cream topping. It is, in short, a dessert that commands attention and is worth every moment spent preparing it. Follow the steps carefully, and you will be rewarded with a truly spectacular result.
Why You'll Love This Recipe
- The base uses both melted butter and a little sugar which, once chilled, creates a firm, crisp foundation that doesn't crumble when sliced.
- Making the caramel from scratch by gently simmering condensed milk provides a deep, authentic toffee flavour and perfect gooey texture that you simply cannot get from a jar.
- Using full-fat cream cheese at room temperature and double cream whipped to soft peaks ensures a rich, stable filling that sets beautifully in the fridge without the need for gelatine.
Ingredients
- 250g digestive biscuits
- 125g unsalted butter, melted
- 2 tablespoons caster sugar
- For the caramel:
- 100g unsalted butter
- 100g dark muscovado sugar
- 1 x 397g tin full-fat condensed milk
- For the filling:
- 600g full-fat cream cheese, at room temperature
- 100g icing sugar, sifted
- 1 teaspoon vanilla extract
- 300ml double cream
- 3 large, ripe but firm bananas
- To decorate:
- 25g good-quality dark chocolate, for shavings
- A dusting of cocoa powder (optional)
Equipment Needed
23cm (9-inch) loose-bottomed springform tin · Food processor or rolling pin and freezer bag · Medium heavy-based saucepan · Wooden spoon or heatproof spatula · Electric hand whisk · Large mixing bowls · Sieve · Palette knife
Step-by-Step Instructions
- First, prepare the tin. You will need a 23cm (9-inch) loose-bottomed springform tin. Lightly grease the base and sides.
- Now for the base. Crush the digestive biscuits to a fine crumb. The easiest way is in a food processor, but you can also place them in a strong plastic bag and bash them with a rolling pin. Transfer the crumbs to a bowl, add the caster sugar, and pour in the melted butter. Mix thoroughly until it looks like damp sand.
- Tip the mixture into the prepared tin and press it down very firmly and evenly over the base using the back of a metal spoon. This firm pressure is key to a non-crumbly base. Place it in the refrigerator to chill for at least 30 minutes while you make the caramel.
- To make the caramel, place the butter and muscovado sugar in a medium, heavy-based saucepan over a low heat. Allow them to melt together gently, stirring until the sugar has dissolved. Add the condensed milk and turn the heat up to medium. Bring it to a gentle, simmering boil, then reduce the heat and let it simmer for 5-7 minutes, stirring continuously with a wooden spoon or spatula to prevent it catching. It will thicken and turn a lovely golden caramel colour. Be very careful as the mixture will be extremely hot. Set aside to cool completely – you can speed this up by placing the saucepan in a sink of cold water.
- While the caramel cools, make the filling. In a large bowl, using an electric hand whisk, beat the room-temperature cream cheese until it is completely smooth and free of any lumps. Sift in the icing sugar and add the vanilla extract, then beat again until just combined.
- In a separate, clean bowl, whip the double cream until it forms soft, floppy peaks. Be careful not to over-whip it. Now, using a large metal spoon or spatula, gently fold the whipped cream into the cream cheese mixture in two stages. The aim is to keep the air in, so use light, cutting and folding motions.
- Time to assemble. Remove the chilled base from the fridge. Pour the cooled caramel over the base and spread it out evenly. Peel and slice the bananas (about 1cm thick) and arrange them in a single, even layer over the caramel.
- Spoon the cheesecake filling over the bananas, starting from the outside and working your way in to ensure there are no air gaps. Gently smooth the top with a palette knife or the back of a spoon.
- Cover the cheesecake carefully with cling film (without it touching the surface) and place it in the refrigerator to set for at least 6 hours, or preferably overnight. This chilling time is not to be rushed.
- To serve, carefully run a thin, sharp knife around the edge of the cheesecake before releasing the springform clip. Use a palette knife to slide it from the base onto a serving plate. Decorate the top with shavings of dark chocolate, made by running a vegetable peeler down the side of the chocolate bar, and a final dusting of cocoa powder if you wish.
Delia's Notes from the Kitchen
The real secret to a perfectly smooth, creamy cheesecake filling lies in the temperature of your cream cheese. It must, without exception, be at room temperature. If you try to beat it straight from the fridge, you will be left with small, persistent lumps that no amount of whisking can remove. Take it out of the fridge a good hour or two before you begin. It makes all the difference.
How to Store & Reheat
The cheesecake must be stored in the refrigerator, covered. It will keep well for up to 3 days, although the bananas may soften slightly over time. I do not recommend freezing this dessert as the texture of both the bananas and the cream filling will be compromised upon thawing.
Frequently Asked Questions
Can I use a pre-made caramel sauce from a jar?
You can in a pinch, but I strongly advise against it. The flavour and texture of homemade caramel made with condensed milk is far superior and is the heart of this dessert. The commercial sauces are often thinner and will not provide the same rich, gooey layer.
Why is my cheesecake filling runny and not setting?
This is almost always due to one of two things. Either low-fat cream cheese or cream was used – you absolutely must use the full-fat versions for stability. Or, the double cream was over-whipped, causing it to split and lose its structure when folded in.
How can I stop the bananas from turning brown?
The best way is to assemble and cover the cheesecake immediately after slicing the bananas. Because they are sealed beneath the cheesecake topping and away from the air, they will stay fresh. Tossing them in a tiny amount of lemon juice can help, but be mindful that it can affect the overall flavour.
My caramel layer is rock hard. What went wrong?
This means the caramel was cooked for too long or at too high a temperature. It needs a gentle simmer and constant stirring for just the 5-7 minutes specified. It should be thick and fudgy, but still pourable when warm.
Can I make this cheesecake ahead of a dinner party?
Absolutely, in fact, it's better if you do. It needs to be made the day before you plan to serve it to allow it to chill and set properly overnight. Simply keep it in the fridge and add the chocolate shavings just before serving.