Classic Black Forest Gateau
A truly magnificent, show-stopping cake that is far less daunting to make than it appears. Follow my step-by-step guide for a perfect result every time.
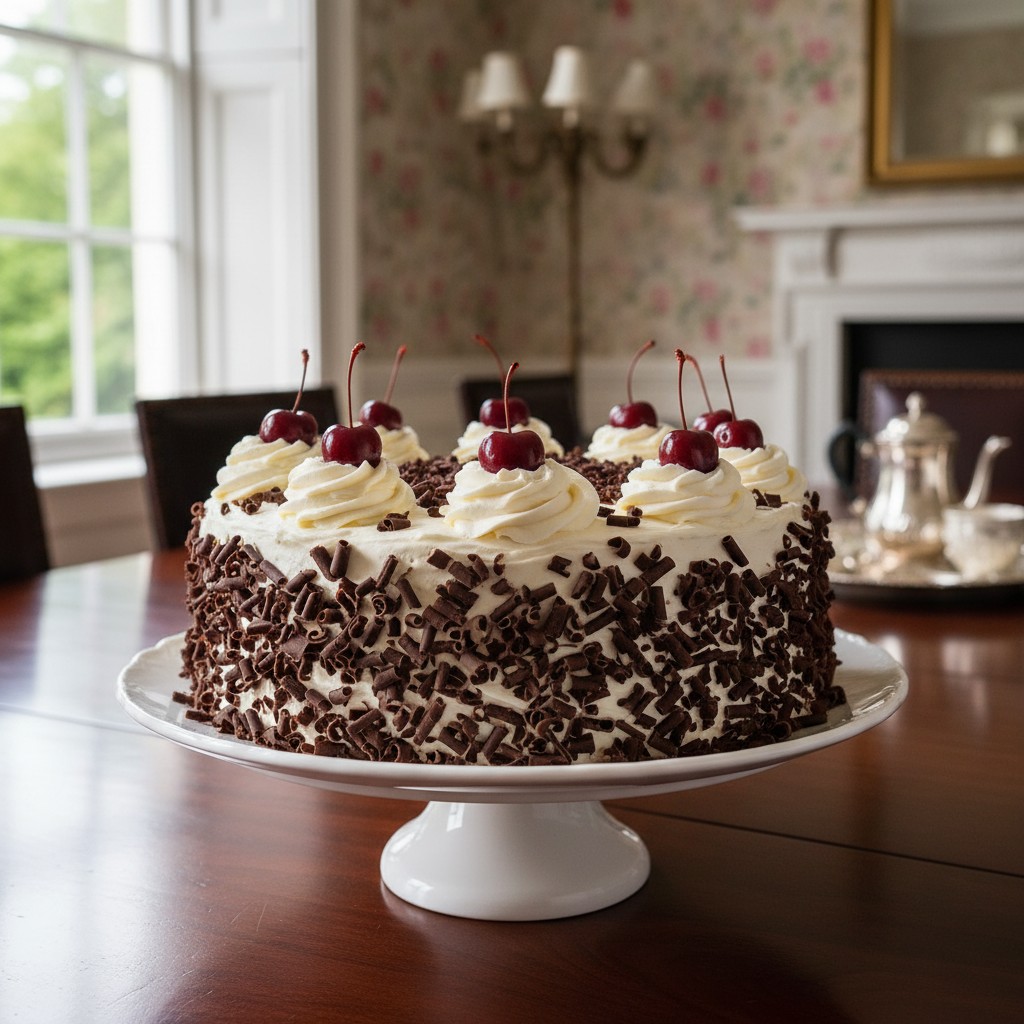
How to Master the Iconic Delia Smith Black Forest Gateau Recipe
There are few cakes as impressive as a classic Delia Smith Black Forest Gateau Recipe. This is the sort of confection that brings a hush to the room, a magnificent tower of dark chocolate, snowy cream, and gleaming cherries. For years, it was the height of dinner party sophistication, and I feel it is high time for its revival. Many people feel it's beyond their capabilities, but that is simply not true. It is a construction, certainly, but one made of simple, manageable components.
The secret, as with so much of cooking, is in the preparation and using the correct method. We will build this cake in stages: a light, cocoa-rich sponge that doesn't rely on chemical raising agents, a sharp cherry filling laced with traditional Kirsch, and a beautifully stable, properly whipped cream. There is no need for anything from a packet here; we are making this properly, from scratch, and the flavour will be incomparable.
So, roll up your sleeves and have confidence. We are not just baking a cake; we are creating a centrepiece. Follow me closely, and I promise you will have a Black Forest Gateau that looks and tastes as if it has come from the finest German patisserie.
Why You'll Love This Recipe
- The Genoise sponge uses whisked whole eggs to create a light, stable structure without baking powder, resulting in a finer crumb that soaks up the Kirsch syrup perfectly.
- Using good-quality dark chocolate (70% cocoa solids) provides a deep, complex flavour that balances the sweetness of the cream and the sharpness of the cherries.
- Soaking the cherries in Kirsch and creating a syrup from the liquid ensures the cherry and Kirsch flavour permeates the entire cake, not just one layer.
- Chilling the bowl and whisk before whipping the cream helps it achieve stiff peaks more quickly and remain stable during assembly.
Ingredients
- For the Chocolate Sponge:
- 6 large free-range eggs, at room temperature
- 175g caster sugar
- 110g plain flour
- 65g good-quality cocoa powder
- 50g unsalted butter, melted and cooled
- For the Cherry Filling & Syrup:
- 1 x 680g jar of Morello cherries in syrup
- 75ml Kirsch (German cherry brandy)
- 2 level tablespoons cornflour
- 50g caster sugar
- For the Filling & Decoration:
- 900ml double cream, well chilled
- 2 tablespoons icing sugar, sifted
- 1 teaspoon vanilla extract
- 100g good-quality dark chocolate (70% cocoa solids), for shavings
- 12 fresh cherries with stalks, to decorate (optional)
Equipment Needed
Two 20cm (8-inch) springform or deep sandwich tins · Baking parchment · Large heatproof bowl · Saucepan · Electric hand whisk · Large metal spoon · Sieve · Wire cooling rack · Long serrated knife · Palette knife · Piping bag with a star nozzle (optional) · Vegetable peeler
Step-by-Step Instructions
- Step 1: Prepare the Tins and Oven. Preheat your oven to 180°C (160°C Fan, Gas Mark 4). Grease and line the bases of two 20cm (8-inch) springform or deep sandwich tins with baking parchment.
- Step 2: Make the Sponge. Place the eggs and caster sugar in a large, heatproof bowl set over a saucepan of gently simmering water (don't let the bowl touch the water). Using an electric hand whisk, whisk for 8-10 minutes, or until the mixture is pale, very thick, and leaves a clear ribbon-like trail when the beaters are lifted. Remove from the heat.
- Step 3: Fold in the Dry Ingredients. Sift the flour and cocoa powder together from a height onto the surface of the whisked egg mixture. Use a large metal spoon to gently fold the flour in, using a 'cutting and turning' motion. Be careful not to knock out the air. When the flour is almost incorporated, pour the cooled melted butter around the edge of the bowl and fold it in until there are no more streaks of flour or butter.
- Step 4: Bake the Sponges. Divide the mixture evenly between the two prepared tins and level the surfaces. Bake on the middle shelf for 25-30 minutes, or until the cakes are well-risen and a skewer inserted into the centre comes out clean. Leave to cool in the tins for 5 minutes before turning them out onto a wire rack to cool completely.
- Step 5: Prepare the Cherry Filling. Drain the cherries from the jar, reserving all the syrup in a saucepan. Set 12 cherries aside for decoration if you are not using fresh ones. In a small bowl, mix the cornflour with 2 tablespoons of the Kirsch to form a smooth paste. Add the caster sugar to the syrup in the saucepan and bring to a simmer. Stir until the sugar has dissolved, then whisk in the cornflour paste. Continue to simmer, stirring, for 1-2 minutes until the syrup has thickened. Remove from the heat, stir in the remaining Kirsch and the drained cherries. Leave to cool completely.
- Step 6: Prepare the Chocolate Shavings. To make chocolate shavings, use a vegetable peeler and run it down the side of the bar of dark chocolate at room temperature. For curls, warm the chocolate slightly first. Set aside.
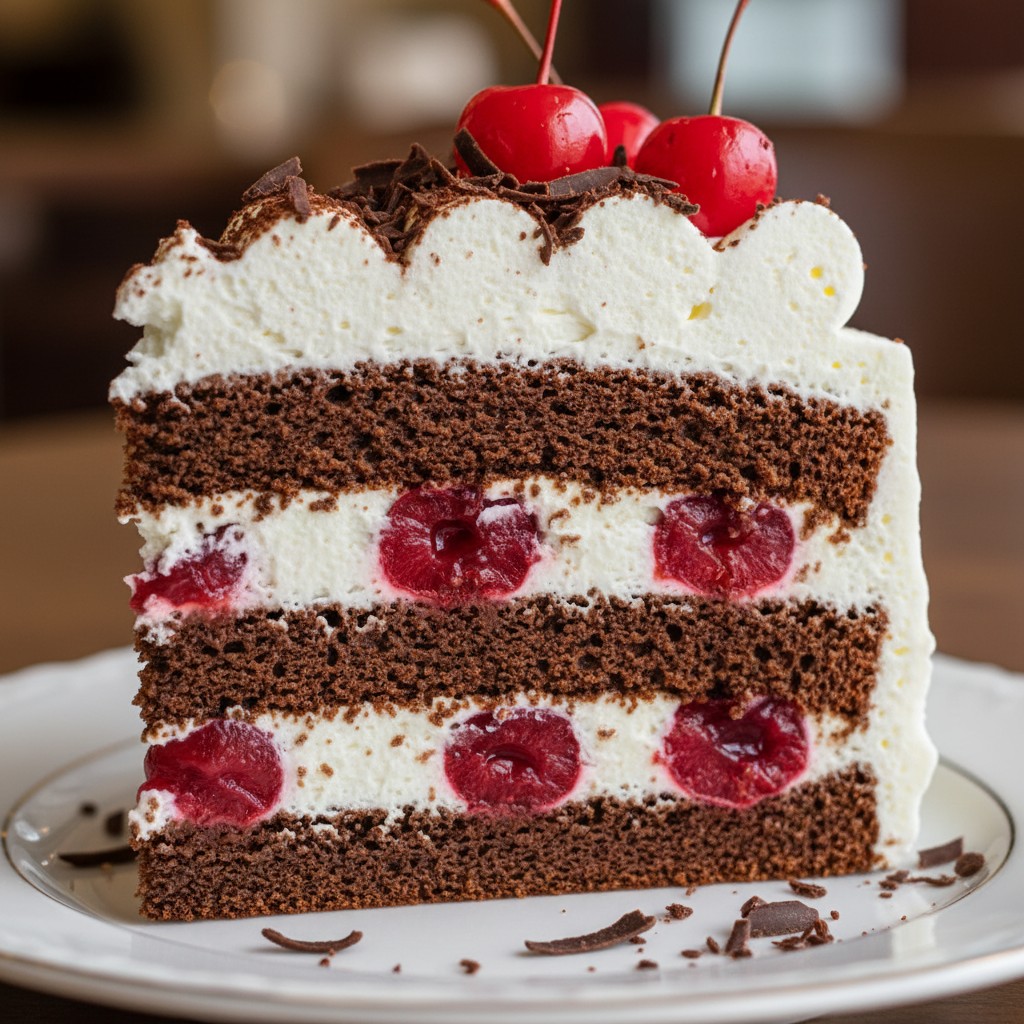
- Step 7: Assemble the Cake. Once the sponges are completely cool, use a long, serrated knife to slice each cake in half horizontally, giving you four layers. Place one layer on your serving plate. Brush it generously with some of the cooled cherry syrup. Whip the cream with the icing sugar and vanilla until it holds stiff peaks. Spread a layer of cream over the sponge, then spoon over a third of the cooled cherry filling.
- Step 8: Layer Up. Place a second sponge layer on top. Repeat the process of brushing with syrup, spreading with cream, and spooning over cherries. Repeat again with the third layer. Place the final sponge layer on top.
- Step 9: Decorate the Gateau. Use a palette knife to cover the top and sides of the entire cake with the remaining whipped cream, creating a smooth or swirled finish as you prefer. Gently press the chocolate shavings onto the sides of the cake. Pipe rosettes of cream around the top edge and place a reserved or fresh cherry on each one. Pile the remaining chocolate shavings in the centre. Chill for at least 1 hour before serving to allow it to set.
- Step 10: Serving. Use a sharp, hot knife to get clean slices. The cake is best served chilled.
Delia's Notes from the Kitchen
A note on cream. The success of the finish depends entirely on properly whipped cream. It must be very cold before you begin. I sometimes place the bowl and the beaters in the refrigerator for 15 minutes beforehand. Whisk it until it is stiff - when you lift the beaters, the peaks should stand up proudly and not flop over. Do not, however, be tempted to over-whisk, or you will begin to make butter! It is a fine line, so keep a close watch.
How to Store & Reheat
The assembled cake must be stored in the refrigerator due to the fresh cream. Place it in a cake box or cover it loosely to prevent it from drying out or absorbing other fridge odours. It is best eaten within 2-3 days of assembly. This cake cannot be frozen once assembled and does not require reheating.
Frequently Asked Questions
Is the Kirsch absolutely essential?
For a truly authentic Black Forest Gateau, yes, the Kirsch is a key flavour component. It adds a specific warmth and sharpness that balances the cake. However, if you need to make it non-alcoholic, you can simply use the cherry syrup from the jar, perhaps with a drop of almond extract to add some complexity.
My sponge was dense, not light. What went wrong?
This is almost always due to losing the air that you have so carefully whisked into the eggs. When folding in the flour, you must be very gentle, using a large metal spoon in a slicing and turning motion. Also, ensure your melted butter has cooled, as warm butter can deflate the mixture.
Can I use frozen cherries instead of jarred?
Yes, you can. You will need to make your own syrup. Simmer about 400g of frozen, pitted cherries with sugar and a little water until the juices run. Then proceed with the cornflour paste method as described. The flavour will be slightly different but still delicious.
How do I get neat, clean slices when serving?
The key is to use a long, sharp knife. For the very best results, dip the knife in a jug of hot water and wipe it clean between each slice. A chilled cake will also slice much more cleanly than one at room temperature.
Can I make any parts of this ahead of time?
Certainly. You can bake the sponges a day in advance. Once completely cool, wrap them tightly in cling film and store them at room temperature. You can also make the cherry filling a day ahead and keep it covered in the refrigerator. I would advise whipping the cream and assembling the cake on the day you plan to serve it for the best freshness.