A Classic Baked Vanilla Cheesecake
There are few desserts as universally loved as a classic baked cheesecake, and this recipe guarantees a sublime, creamy texture. Follow these steps precisely for a perfect, crack-free result that will become a firm family favourite.
For many home cooks, the baked cheesecake represents something of a culinary Everest, fraught with potential pitfalls like cracks, curdling, and a soggy base. I'm here to tell you that this fear is entirely misplaced. With a little understanding of the science and a very precise method, a perfect, creamy, and utterly glorious cheesecake is well within your grasp.
This recipe is the culmination of years of testing. It isn't about fancy tricks; it's about respecting the ingredients and the process. We will use a gentle water bath to ensure the cheesecake bakes evenly, creating that silken texture that is its hallmark. We will also pay close attention to the cooling process, which is, I must stress, just as important as the baking itself.
So, put aside any past anxieties. Read the recipe through once or twice before you begin, assemble your ingredients and equipment, and prepare to learn how to make a truly classic dessert. Once mastered, it is a recipe you will return to again and again for special occasions or simply when you feel the need for a little indulgence.
Why You'll Love This Recipe
- A water bath (bain-marie) creates a humid, steamy environment in the oven, which regulates the temperature and ensures the delicate custard-like filling cooks gently and evenly, preventing cracks.
- Using full-fat, room temperature ingredients is crucial. Cold ingredients don't combine smoothly, leading to lumps and over-mixing, which incorporates air and causes the cheesecake to rise and fall, cracking in the process.
- The gradual cooling process—first in the turned-off oven, then at room temperature, and finally in the fridge—prevents the cheesecake from shrinking too quickly, which is the most common cause of surface cracks.
Ingredients
- For the base:
- 225g (8oz) digestive biscuits
- 100g (4oz) unsalted butter, melted
- For the filling:
- 900g (2lb) full-fat cream cheese (it must be full-fat), at room temperature
- 250g (9oz) caster sugar
- 4 large eggs, at room temperature
- 2 tsp pure vanilla extract or 1 tsp vanilla bean paste
- Zest of 1 lemon, finely grated
- 200ml (7 fl oz) soured cream, at room temperature
Equipment Needed
23cm (9-inch) springform cake tin · Large, deep-sided roasting tin · Heavy-duty aluminium foil · Electric hand mixer or stand mixer · Food processor (optional) · Baking parchment · Spatula
Step-by-Step Instructions
- First, prepare your tin. You will need a 23cm (9-inch) springform cake tin. Grease the base and sides lightly and then line the base with a circle of baking parchment. To prepare for the water bath, wrap the outside of the tin in a double layer of heavy-duty aluminium foil, ensuring it comes well up the sides to prevent any water from seeping in.
- Pre-heat your oven to 160°C, 325°F, Gas Mark 3.
- Now for the base. Crush the digestive biscuits to a fine crumb. The easiest way to do this is in a food processor, but you can also place them in a strong plastic bag and crush them with a rolling pin. Tip the crumbs into a bowl and pour over the melted butter. Mix thoroughly until the crumbs are evenly coated.
- Press this mixture firmly and evenly into the base of the prepared tin. Use the back of a spoon or the base of a glass to get it really compact. Place the tin in the refrigerator to chill while you make the filling.
- For the filling, it is absolutely vital that all your ingredients are at room temperature. In a large bowl, using an electric hand mixer on a low speed, beat the cream cheese until it is smooth and there are no lumps. This should only take a minute.
- Gradually add the caster sugar, mixing on low speed until just combined. Scrape down the sides of the bowl. Now, add the eggs one at a time, mixing on low after each addition just until the yolk disappears. Do not over-beat at this stage; you want to incorporate as little air as possible.
- Gently stir in the vanilla, lemon zest, and soured cream with a spatula until everything is just combined and the mixture is smooth.
- Pour the filling over the chilled biscuit base. Place the springform tin into a larger, deep-sided roasting tin. Carefully pour hot water from a kettle into the roasting tin, so it comes about halfway up the sides of the cheesecake tin. Be very careful not to splash any water onto the cheesecake itself.
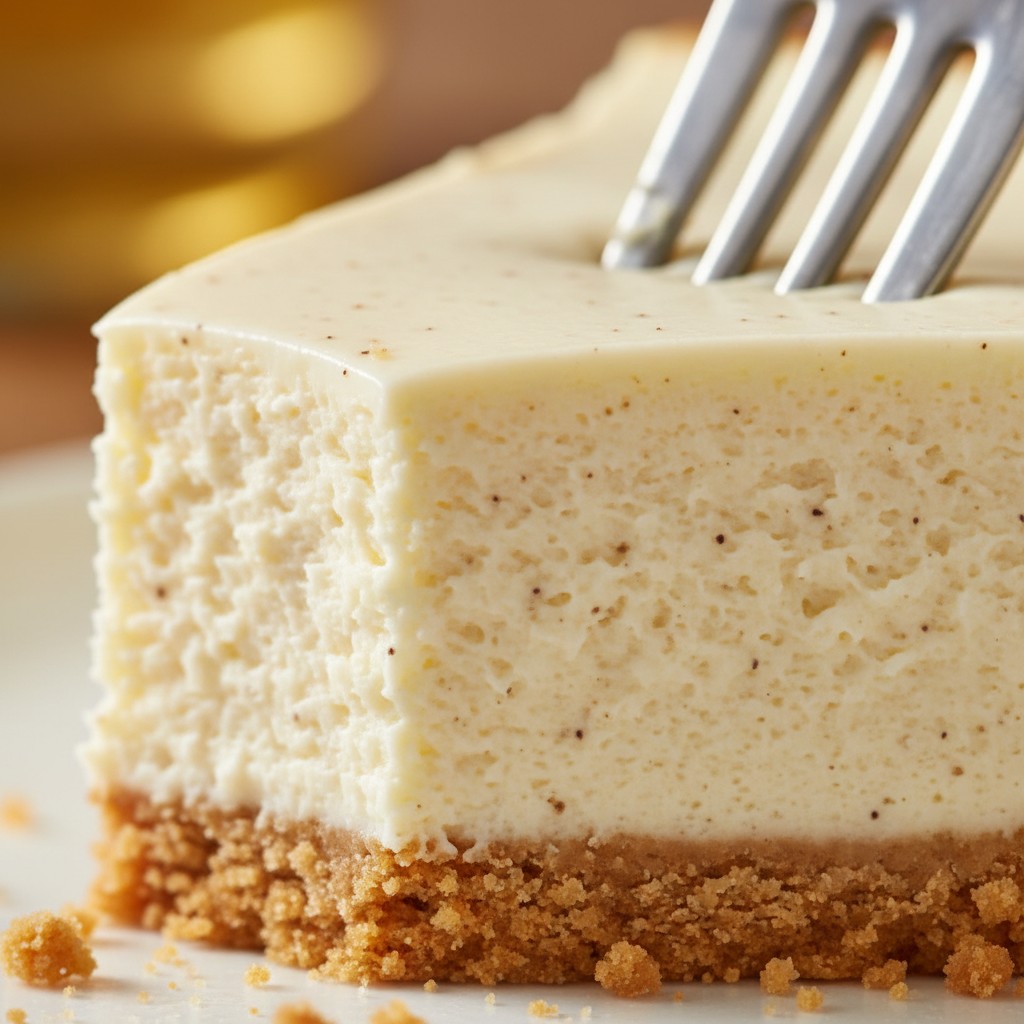
- Carefully transfer the roasting tin to the centre of the pre-heated oven. Bake for 1 hour to 1 hour and 15 minutes. The cheesecake is ready when the edges are set, but the centre still has a slight wobble when you gently shake the tin. Do not be tempted to over-bake.
- Now for the crucial cooling stage. Turn off the oven, prop the door open slightly with a wooden spoon, and leave the cheesecake to cool in the oven for 1 hour. This gradual temperature change is key to preventing cracks.
- After an hour, remove the cheesecake from the oven and from its water bath. Remove the foil and let it cool completely to room temperature on a wire rack.
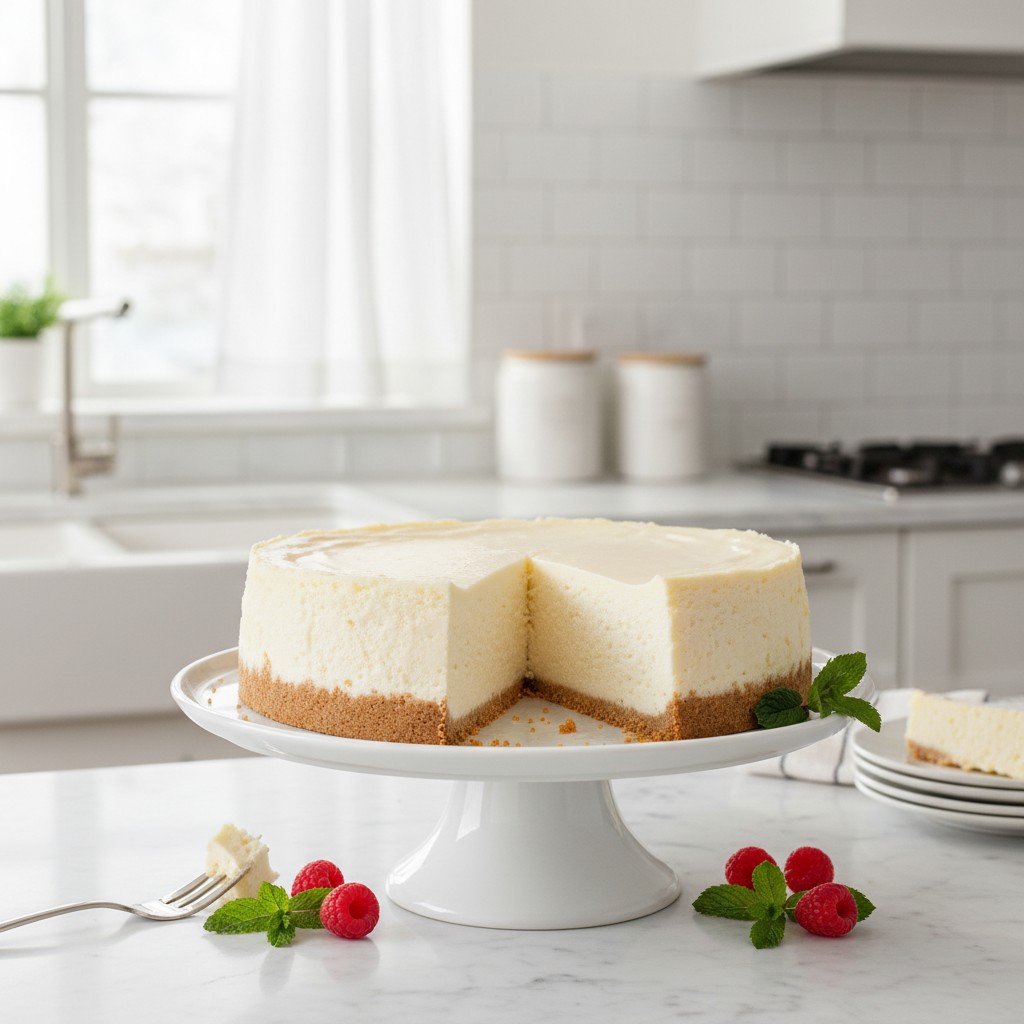
- Once completely cool, cover loosely with clingfilm and transfer to the refrigerator to chill for at least 6 hours, or preferably overnight, before serving. To serve, run a thin, sharp knife around the edge of the cheesecake before releasing the springform tin.
Delia's Notes from the Kitchen
The secret to a truly great cheesecake lies not just in the recipe, but in the temperature of your ingredients. Before you even think about starting, take your cream cheese, eggs, and soured cream out of the refrigerator and allow them to come up to room temperature for at least an hour. This is not a step to be skipped. Cold ingredients will refuse to combine smoothly, forcing you to over-beat, which is the enemy of a perfect cheesecake. Be patient here, and the final result will be your reward: an unctuous, creamy, and flawless dessert.
How to Store & Reheat
The cheesecake must be stored in the refrigerator. Cover it loosely with clingfilm or keep it in a cake container. It will keep beautifully for up to 4 days. It is designed to be eaten chilled and should not be reheated. For the best flavour and texture, allow a slice to sit at room temperature for about 15-20 minutes before eating.
Frequently Asked Questions
Why did my cheesecake crack?
Cracking is almost always due to one of three things: over-mixing (which incorporates too much air), over-baking, or a sudden change in temperature. Follow the instructions for mixing on a low speed and the gradual cooling process in the oven, and you should have a perfect, smooth top.
Can I use low-fat cream cheese or soured cream?
I'm afraid for this recipe, the answer is no. Full-fat dairy is essential for the structure and creamy texture of a baked cheesecake. Low-fat versions have a higher water content and will result in a grainy, watery, and unstable dessert. It is an indulgence, so it's best to make it properly.
Is the water bath really necessary?
Yes, I believe it is essential for a foolproof result. The steam it creates ensures the cheesecake bakes gently and evenly, preventing the edges from over-baking before the centre is set. It is the single best technique for achieving that signature smooth, creamy texture and avoiding cracks.
How do I know for certain when the cheesecake is cooked?
The visual cue is key. The outer 2-3 inches of the cheesecake will look set and matte, while the very centre will still have a distinct wobble, like a barely-set jelly. It will continue to cook and set as it cools. If you wait until the centre is firm, it will be over-baked and the texture will be grainy.
Can I freeze this cheesecake?
Yes, this cheesecake freezes very well. Once completely chilled, you can freeze it whole or in individual slices. Wrap it well in a double layer of clingfilm and a layer of foil. It will keep for up to two months. Defrost it overnight in the refrigerator before serving.