My Classic Yorkshire Puddings
There is a certain magic to a perfectly risen Yorkshire pudding, and it’s a magic that is surprisingly easy to master. Follow these instructions to the letter, and you will have four magnificent, golden puddings to grace your Sunday table.

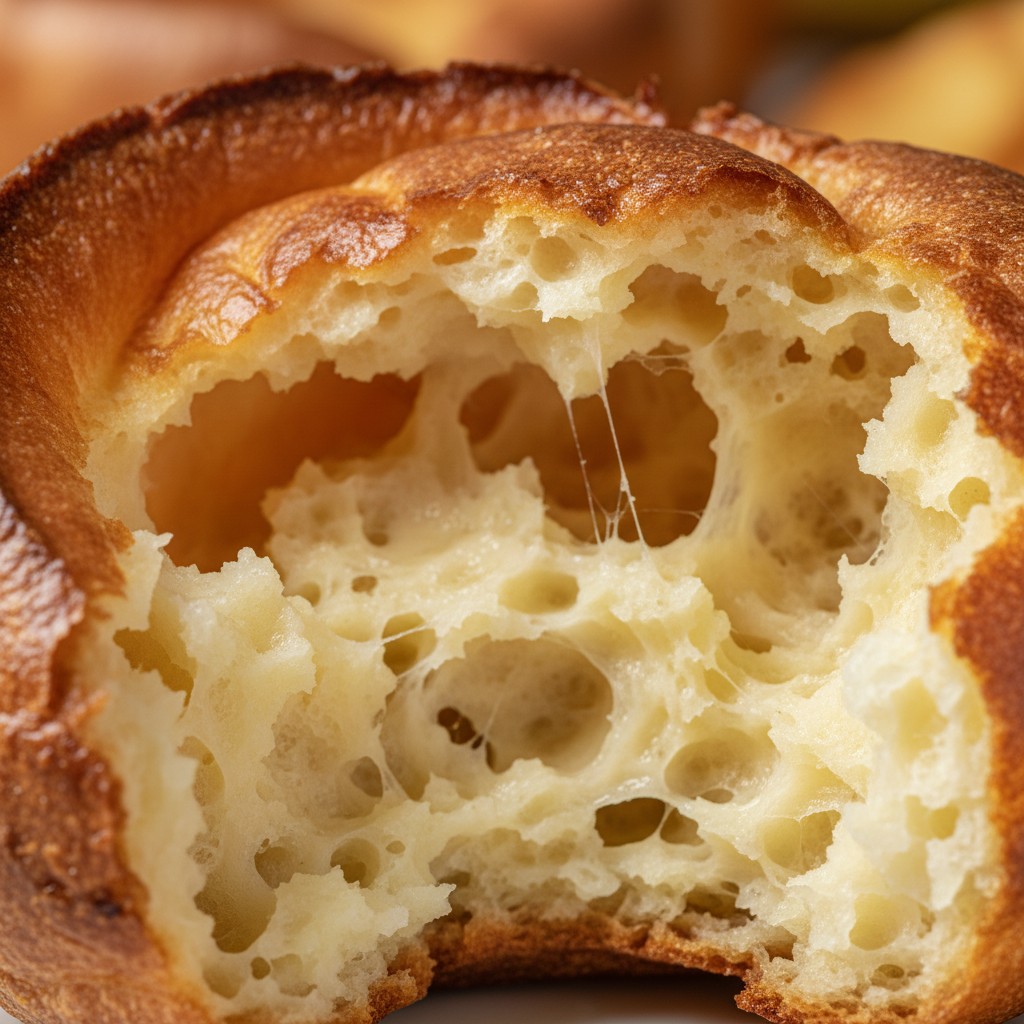
There are few sights in the British kitchen more rewarding than a tray of proud, golden Yorkshire puddings fresh from the oven. For years, they have been shrouded in a sort of mystique, with tales of collapsing failures and jealously guarded family secrets. I am here to tell you that this need not be the case. The perfect Yorkshire pudding is not about luck; it is about method and understanding a few simple, crucial rules.
This recipe is the culmination of years of testing and is, I can confidently say, completely foolproof. The secret lies in a few key principles: the right proportions, the importance of resting the batter, and, most critically, the searing heat of the fat before the batter even thinks about entering the tin. It's a chemistry lesson in the kitchen, and one that yields the most delicious results.
Forget any anxieties you may have. We are going to approach this calmly and methodically. With just three main ingredients and a little bit of kitchen science, you will produce puddings that are crisp on the outside, soft and slightly custardy within, and have risen so magnificently you’ll want to applaud. So, let’s begin.
Why You'll Love This Recipe
- Using plain flour and the correct liquid ratio creates a batter with the perfect gluten structure for rising and holding its shape.
- Resting the batter for at least 30 minutes allows the starch granules in the flour to swell, resulting in a lighter, more tender pudding.
- Getting the fat smoking hot in the tin before adding the batter is the single most important step. This initial blast of heat forces the batter to rise rapidly, creating the characteristic hollow, crisp shell.
Ingredients
- 75g plain flour
- 1 large egg
- 100ml milk (I find semi-skimmed gives a lighter result, but whole is also fine)
- A pinch of salt
- Beef dripping or vegetable oil, for cooking
Equipment Needed
4-hole Yorkshire pudding tin · Mixing bowl · Flour sifter or fine-meshed sieve · Hand whisk · Measuring jug
Step-by-Step Instructions
- First, let's make the batter, as it needs to rest. Sift the 75g of plain flour and the pinch of salt into a bowl from a height – this incorporates air, which is the first step to a good rise. Make a well in the centre of the flour.
- Break the egg into the well. Using a simple hand whisk, begin to incorporate the flour from the edges into the egg. Don't worry about making it perfectly smooth just yet.
- Now, slowly add the 100ml of milk, a little at a time, continuing to whisk until all the milk is incorporated and you have a smooth batter, roughly the consistency of single cream. There is no need to over-beat it.
- Cover the bowl and leave the batter to rest for at least 30 minutes at room temperature, or up to a couple of hours if that suits your timing better. This is not a step to be skipped.
- About 20 minutes before you're ready to cook, preheat your oven to its highest setting, 230°C (210°C Fan, Gas Mark 8). This high heat is absolutely crucial.
- Place a 4-hole Yorkshire pudding tin (or four individual tins) on a baking tray. Add about a quarter of a teaspoon of beef dripping or vegetable oil to each compartment of the tin.
- Place the tin in the preheated oven on a high shelf for at least 10 minutes. You need the fat to be sizzling and smoking hot. Be very careful when you check and remove it from the oven.
- Give your rested batter a final quick whisk. Carefully remove the hot tin from the oven. Working quickly and confidently, pour the batter evenly into the four compartments. You should hear a definite sizzle as the batter hits the hot fat.
- Immediately return the tin to the top shelf of the oven and close the door. Do not, under any circumstances, open the oven door for at least 20 minutes.
- After 20 minutes, check the puddings. They should be gloriously risen, golden brown, and crisp. They may need another 5 minutes to get properly coloured. Serve immediately.
Delia's Notes from the Kitchen
The one thing I want you to take away is confidence. People worry so much about these, but they are simpler than you think. The heat is everything. If you get your fat smoking hot, your oven to its highest temperature, and you resist the urge to peek, you will be rewarded. Trust the process, and you will have perfect puddings every single time.
How to Store & Reheat
Yorkshire Puddings are truly at their best the moment they leave the oven. However, if you have leftovers, they can be stored in an airtight container at room temperature for a day. To reheat and bring back some crispness, place them in a hot oven (around 200°C) for 3-5 minutes until warmed through.
Frequently Asked Questions
Why didn't my Yorkshire puddings rise?
There are usually three culprits. One: the oven wasn't hot enough. Two: the fat wasn't sizzling hot when you added the batter. Three: you opened the oven door too early, causing them to collapse. Follow the heat instructions precisely for success.
Can I make the batter ahead of time?
Yes, absolutely. In fact, it benefits from it. You can make the batter up to 24 hours in advance. Simply cover it and keep it in the fridge, then give it a good whisk before using. Allow it to come to room temperature for 30 minutes before you cook.
Can I use a muffin tin instead?
Yes, a 12-hole muffin tin will work perfectly well for smaller, individual puddings. You will need less fat in each hole, and they will likely cook a little faster, so check them after 15 minutes.
My batter seems a bit lumpy, what should I do?
A few tiny lumps are perfectly fine. The resting period often helps to smooth these out. If it is very lumpy, you can pass it through a sieve to ensure a perfectly smooth consistency before you let it rest.
Is beef dripping essential for the flavour?
Beef dripping provides a traditional, savoury depth that is hard to replicate. However, if you are vegetarian or simply don't have any, a neutral oil with a high smoke point like vegetable or sunflower oil will still produce wonderfully crisp and delicious puddings.