How to Make Perfect Yorkshire Puddings for a Crowd
Forget flat, disappointing puddings forever with my definitive method. This recipe guarantees towering, crisp, and utterly delicious Yorkshire Puddings for eight.
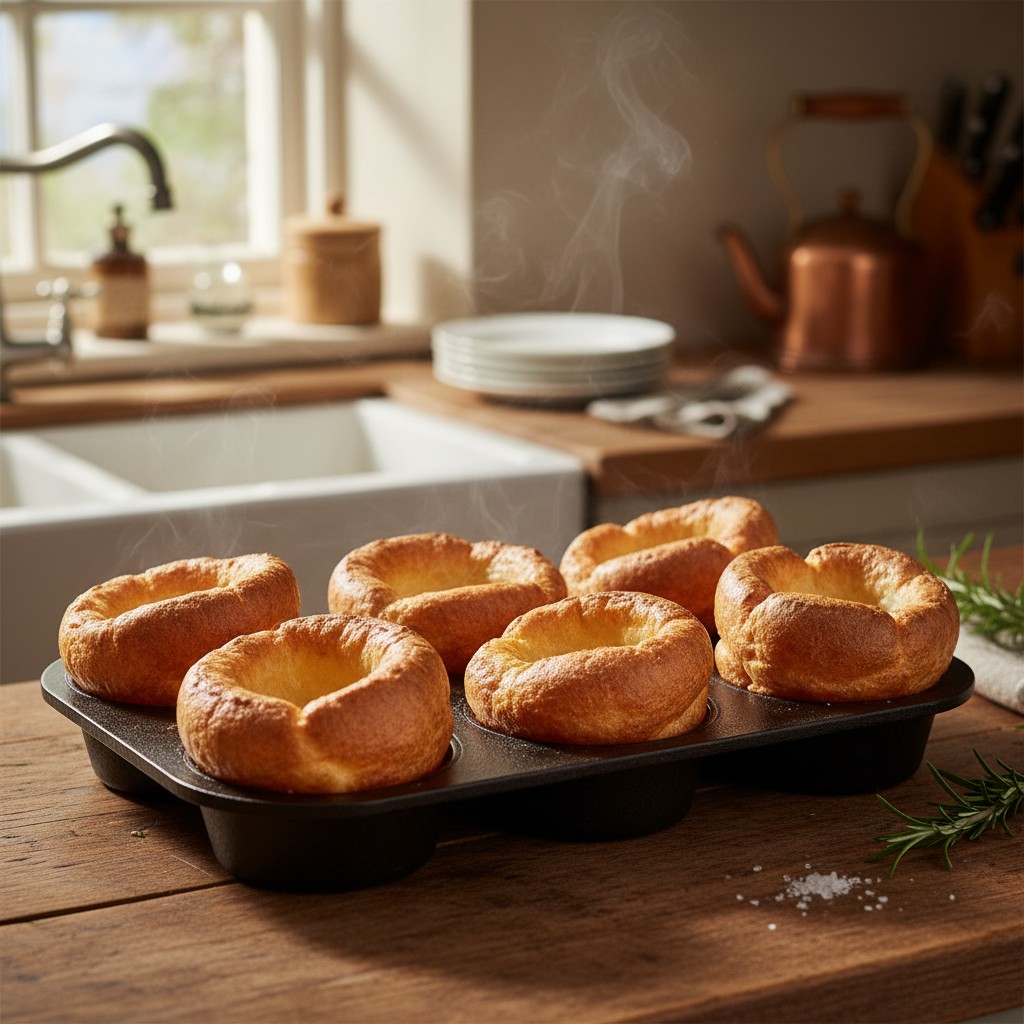
There are few sights more welcome on a Sunday lunch table than a tray of magnificent, golden, risen-to-attention Yorkshire Puddings. Yet, for so many, they remain a source of kitchen anxiety. Will they rise? Will they be crisp? The truth is, there is no great mystery to it, merely a little science and a method that must be followed with a certain amount of precision.
This recipe is the one I have relied upon for decades. It has never, ever failed me. The key is not in some secret ingredient, but in understanding the principles at play: the resting of the batter, the crucial temperature of the fat, and the heat of the oven. It is a simple trio of flour, eggs, and liquid, transformed into something truly spectacular.
So, put aside any past disappointments. With this guide, we will walk through each step together, demystifying the process and ensuring you can produce eight perfect, individual puddings with absolute confidence. This is a foundational skill for any British cook, and one I am certain you will master.
Why You'll Love This Recipe
- Using plain flour and the correct liquid ratio creates a batter with the perfect gluten structure for rising and holding its shape.
- Resting the batter is non-negotiable; it allows the starch granules to swell and the gluten to relax, leading to a lighter, more tender pudding.
- The secret to a dramatic rise is the temperature shock: cold batter hitting sizzling hot fat in a ferociously hot, preheated tin.
Ingredients
- 110g (4 oz) plain flour
- A pinch of salt
- 2 large free-range eggs
- 275ml (½ pint) full-fat milk, or a 50/50 mix of milk and water
- 3-4 tablespoons beef dripping, lard, or vegetable oil
Equipment Needed
Large mixing bowl · Flour sifter or fine-mesh sieve · Balloon whisk · Measuring jug · Deep 8 or 12-hole muffin tin
Step-by-Step Instructions
- First, make the batter. Sift the plain flour and salt into a large mixing bowl from a height – this helps to aerate it. Make a well in the centre of the flour.
- Break the two eggs into the well. Using a balloon whisk, begin to whisk the eggs, gradually incorporating the flour from the sides of the well to form a thick, smooth paste in the middle. This technique helps to prevent lumps.
- Once you have a thick paste, begin to add the milk a little at a time, still whisking, until it is all incorporated. Continue to whisk until the batter is smooth and has the consistency of single cream. Don't worry if you have a few small lumps; we can deal with those later.
- Now for the most important step: resting. Cover the bowl with a tea towel or cling film and leave the batter to stand at room temperature for at least 30 minutes. An hour is even better. This allows the starch in the flour to swell, which is crucial for a good rise. If your batter was lumpy, you can now pour it through a sieve into a jug.
- When you are ready to cook the puddings, preheat your oven to its highest setting, typically 220°C (200°C Fan) / Gas Mark 7. This needs to be done at least 20 minutes before baking.
- Choose a deep 12-hole muffin tin (you will only use 8 holes) or two smaller tins. Add about ½ teaspoon of beef dripping or oil into each of the 8 holes.
- Place the tin into the preheated oven on a high shelf for a good 10 minutes, or until the fat is sizzling and smoking hot. This is absolutely critical.
- Carefully remove the hot tin from the oven. Working quickly and confidently, pour the rested batter from your jug into each of the 8 holes, filling them about two-thirds full.
- Immediately return the tin to the top shelf of the oven. Do not be tempted to open the oven door for at least 20 minutes, as the drop in temperature will cause them to collapse.
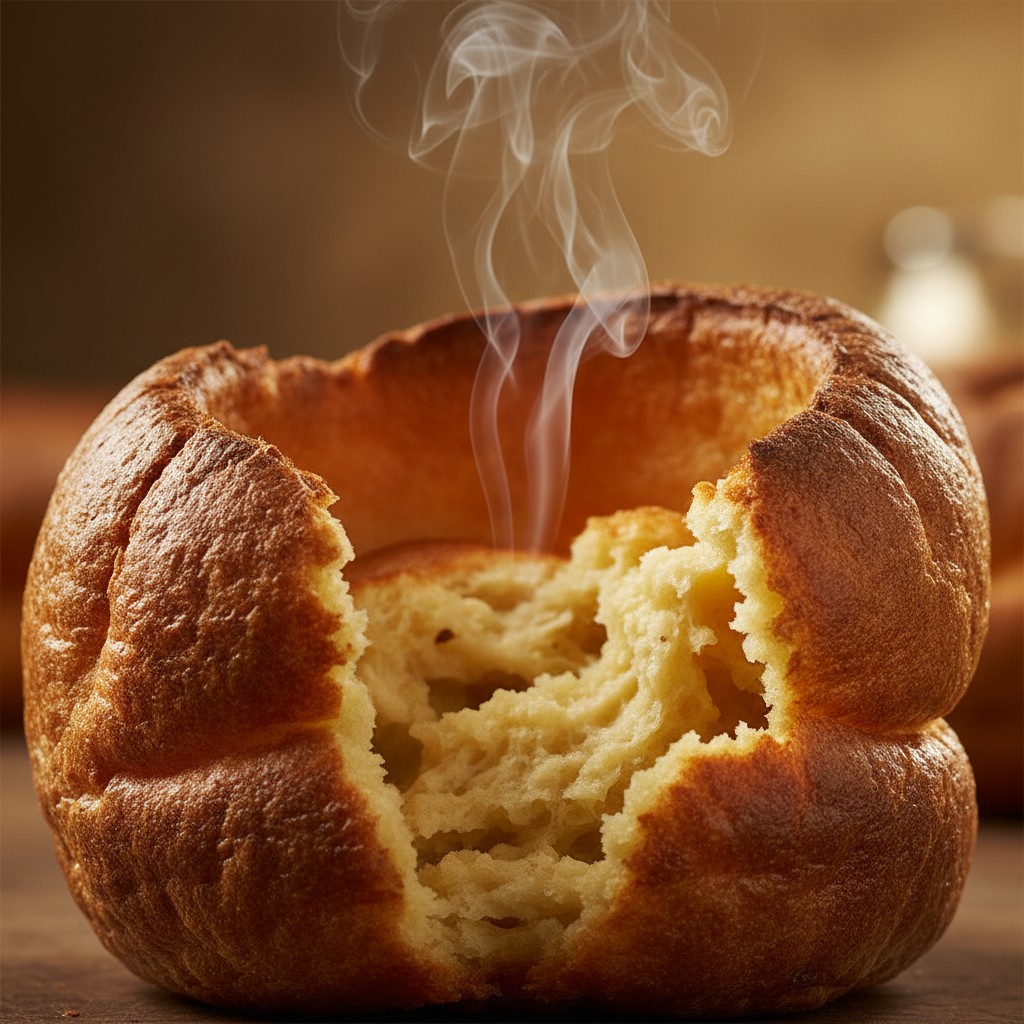
- After 20 minutes, check the puddings. They should be spectacularly risen, golden brown, and crisp. If they need a little longer, give them another 3-5 minutes.
- Serve immediately, straight from the oven, while they are at their magnificent best.
Delia's Notes from the Kitchen
The golden rule is a simple one of physics: the coldest batter must meet the hottest fat. If you have time, chilling the rested batter in the fridge for 30 minutes before use will give you an even more spectacular rise. It’s this dramatic temperature contrast that does all the hard work for you.
How to Store & Reheat
Should you have any leftovers (which is unlikely!), allow the puddings to cool completely. Store them in an airtight container at room temperature for up to 2 days. To bring them back to life, place them on a baking tray in a hot oven at 200°C (180°C Fan) / Gas Mark 6 for 4-5 minutes until hot and crisp again.
Frequently Asked Questions
Why didn't my Yorkshire puddings rise?
This is almost always due to temperature. Either the oven wasn't hot enough, or the fat in the tin wasn't smoking hot when the batter was added. Also, opening the oven door too early will cause them to deflate instantly.
Can I use self-raising flour instead of plain flour?
I strongly advise against it. Self-raising flour creates a cake-like, fluffy texture, which is not what we want. Plain flour provides the correct gluten structure that allows the pudding to stretch and rise dramatically, creating that classic crisp shell and soft interior.
My batter is lumpy, what should I do?
The best way to rescue a lumpy batter is to pour it through a fine-mesh sieve into another bowl or jug. Alternatively, a quick blitz with a stick blender will smooth it out perfectly.
Can I make the batter ahead of time?
Yes, absolutely. In fact, making it a few hours ahead, or even the night before, and storing it covered in the fridge is beneficial. Just give it a quick whisk before using, but there is no need to bring it to room temperature – cold batter hitting hot fat creates an even better rise.
Should I add more eggs for a better rise?
No, the ratio in this recipe is carefully balanced. Adding too many eggs can make the puddings heavy and overly 'eggy', preventing them from becoming light and crisp. Trust the classic proportions.