How to Make Perfect Chicken Liver Pâté
There's a great deal of satisfaction to be had in making your own pâté, and it's so much simpler than you might think. This recipe will give you a sublimely smooth and richly flavoured result that is streets ahead of anything you can buy.
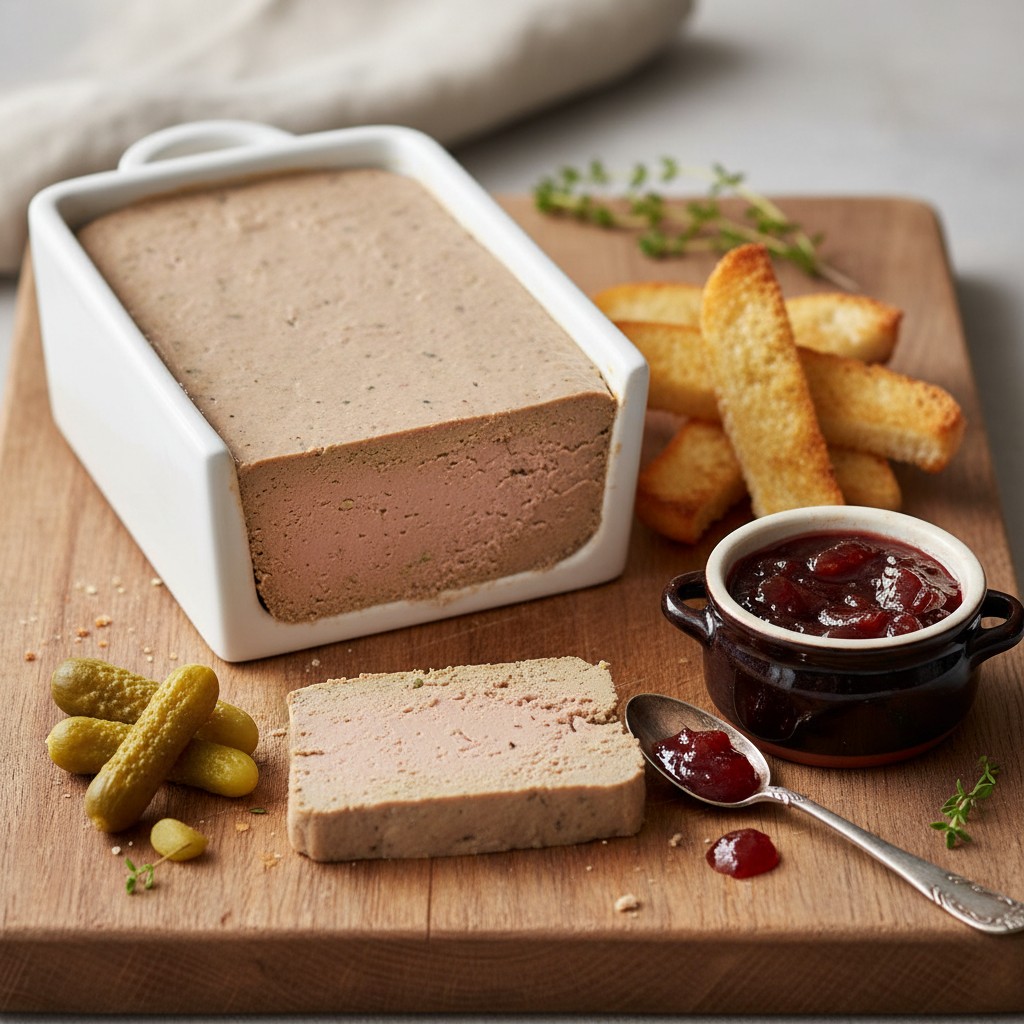
There is something deeply satisfying about presenting a homemade pâté at the beginning of a meal. For years, it seemed to be a forgotten art, something people only bought in tubs from the supermarket. But to make it yourself is to understand what a truly wonderful thing it can be – rich, silky, and deeply savoury.
The key, as with so many things in cookery, is not to be intimidated. The process is really quite straightforward, provided you pay attention to a few crucial details. The most important of these is the cooking of the livers themselves; they must, absolutely must, remain pink in the centre to avoid a grainy, bitter result. The other is the sieving, a step some are tempted to skip, but which I insist upon for that truly professional, smooth-as-velvet finish.
This recipe has been tested and re-tested over the years to make it as reliable as possible. Once you've mastered it, it will become a cornerstone of your entertaining repertoire, perfect for spreading on hot toast for a simple lunch, or as the elegant opening to a special dinner party. It is, quite simply, a classic for a reason.
Why You'll Love This Recipe
- Cooking the livers until they are just pink on the inside is crucial. This technique prevents the proteins from becoming tough and ensures the final pâté is creamy and tender, not grainy.
- Forcing the blended mixture through a fine-meshed sieve is a non-negotiable step. It removes any tough membranes or sinews, guaranteeing a perfectly silky, smooth texture that melts in the mouth.
- Sealing the finished pâté with a layer of clarified butter does more than just look professional. It creates an airtight barrier that prevents oxidation, keeping the pâté fresh and pink for several days.
Ingredients
- 450g fresh chicken livers
- 175g unsalted butter, plus an extra 75g for sealing
- 2 large shallots, finely chopped (or 1 small onion)
- 2 cloves garlic, crushed
- 1 tsp fresh thyme leaves, plus a few sprigs for garnish
- 60ml brandy or port
- 75ml double cream
- A good grating of fresh nutmeg
- Salt and freshly milled black pepper
Equipment Needed
Food processor or high-powered blender · Large, heavy-based frying pan · Fine-meshed sieve · Flexible spatula or ladle · Small sharp knife · 500ml terrine dish or 6-8 small ramekins
Step-by-Step Instructions
- Begin with the most important step: preparing the livers. Using a small, sharp knife, carefully trim away any stringy sinews or greenish-looking spots (these are remnants of the gall bladder and will make the pâté bitter). Cut the livers into roughly equal, bite-sized pieces and pat them dry with kitchen paper.
- Next, melt 100g of the butter in a large, heavy-based frying pan over a medium heat. Add the finely chopped shallots and cook gently for about 5-7 minutes until they are soft and translucent, but not browned. Add the crushed garlic and thyme leaves and cook for one minute more until fragrant.
- Turn the heat up slightly, add the prepared chicken livers to the pan, and season well with salt, pepper, and nutmeg. Sauté for about 2-3 minutes on each side. The aim is to have them browned on the outside but still quite pink in the middle. To check, you can cut one open. Do not overcook them.
- Now, remove the pan from the heat and pour in the brandy. Be careful, as it may flame. Return to the heat for just 30 seconds, scraping the base of the pan to incorporate all the flavourful brown bits. Then, switch off the heat and allow it to cool for a few minutes.
- Transfer the contents of the pan to a food processor or a high-powered blender. Add the remaining 75g of butter (cut into cubes) and the double cream. Blitz until the mixture is as smooth as you can possibly get it.
- Now for the crucial part. Place a fine-meshed sieve over a clean bowl and, using the back of a ladle or a flexible spatula, force the pâté mixture through the sieve. This will take a few minutes of effort, but it is what will give you that incredibly smooth, professional texture. Discard the solids left in the sieve.
- Taste the sieved pâté and adjust the seasoning if needed – it may need a little more salt or pepper. Pour the mixture into one large serving dish (like a 500ml terrine) or individual ramekins. Smooth the top and tap the dish on the work surface to remove any air bubbles.
- Cover with cling film, pressing it directly onto the surface of the pâté to prevent a skin from forming. Chill in the refrigerator for at least 4 hours, or overnight, until completely firm.
- To finish, melt the extra 75g of butter for sealing in a small saucepan over a low heat. Let it bubble gently, then spoon off the white solids from the surface, leaving the clear, golden butter underneath. This is clarified butter. Let it cool slightly, then pour it over the surface of the chilled pâté. Add a sprig of thyme for decoration. Return to the fridge for the butter to set.

Delia's Notes from the Kitchen
A note on the butter: Please use unsalted butter for this recipe. It gives you complete control over the seasoning. The butter you use for the pâté itself doesn't need to be clarified, but it is vital that the butter for the seal is. Clarifying removes the milk solids, which can go off, and ensures the seal is pure and protective, preserving your beautiful pâté for longer.
How to Store & Reheat
With its clarified butter seal intact, the pâté will keep beautifully in the coldest part of the refrigerator for up to 5 days. Once the seal is broken, it should be consumed within 2 days. Pâté is always served chilled and does not require reheating.
Frequently Asked Questions
Why is my pâté bitter or grainy?
This is almost always due to one of two things: the livers were overcooked, which makes them tough and bitter, or they weren't trimmed properly and some of the green bile duct was left attached. Always cook them until just pink inside and be meticulous with the trimming.
Do I really have to sieve the pâté?
If you want a truly sublime, silky-smooth pâté, then yes, you absolutely must. Skipping this step will result in a more rustic, textured pâté, which is fine, but sieving is what elevates it to something special.
Can I freeze chicken liver pâté?
Yes, you can. Pot the pâté into freezer-safe containers and pour over the clarified butter seal. Once set, wrap the container tightly in cling film and foil. It will keep for up to 2 months. Defrost overnight in the refrigerator before serving.
I don't have brandy. What can I use instead?
Port is the classic alternative and works wonderfully. You could also use Madeira, a dry sherry, or even a splash of Calvados. The alcohol adds essential depth of flavour.
My butter seal cracked. Is it ruined?
Not at all. The seal is there to prevent oxidation. If it cracks, the pâté underneath might discolour a little where it's exposed to air, but it will still be perfectly delicious. Just aim to eat it within a day or two.