Delia's Classic British Pancakes
Discover the simple joy of making perfect British pancakes from scratch. My time-honoured recipe guarantees thin, delicate crêpes every time.
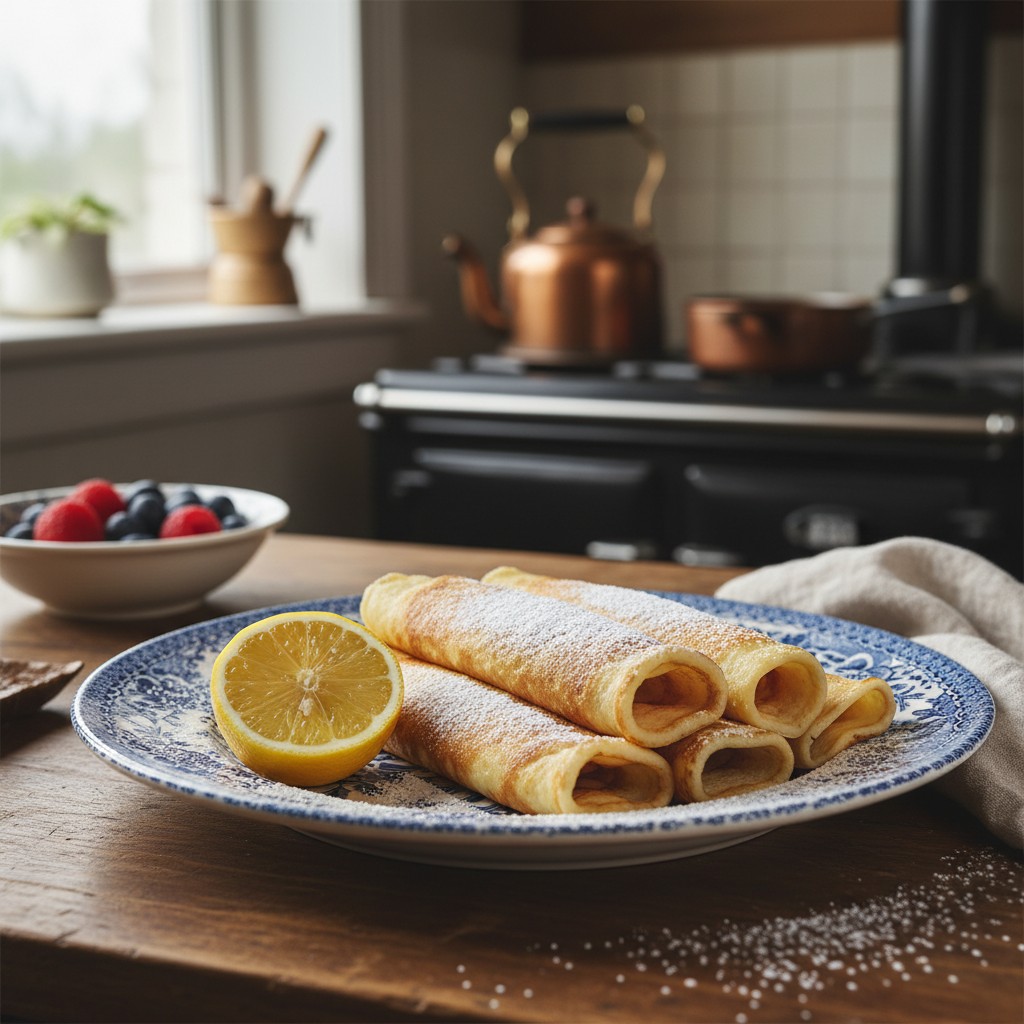
There is a particular, quiet satisfaction that comes from mastering the art of the simple British pancake. It’s a skill that, once learned, will serve you well for a lifetime of Shrove Tuesdays, lazy weekend breakfasts, and impromptu desserts. These are not the thick, fluffy pancakes you might find across the Atlantic; these are their elegant, lacy cousins, more akin to a French crêpe, designed for rolling and filling with the classic, sharp sweetness of lemon and sugar.
For many of us, the smell of pancakes cooking is a powerful memory, a signal of tradition and simple comfort. The key, as with so much in cooking, is not in a long list of ingredients but in understanding the method. It’s about the consistency of the batter, the heat of the pan, and the confidence of the cook. There is a certain rhythm to pancake making, and once you find it, you’ll wonder why you ever reached for a packet mix.
So, let’s begin. This is my definitive, time-tested recipe. It’s the one I have taught for years, and it has never failed me. Follow the steps precisely, and you will be rewarded with a stack of beautifully thin, golden pancakes, ready to be enjoyed in the most traditional and, I think, the very best way.
Why You'll Love This Recipe
- Resting the batter is essential. This allows the starch in the flour to swell and the gluten to relax, resulting in a lighter, more tender pancake with no 'floury' taste.
- Using a mixture of milk and water creates a thinner batter, which is the secret to achieving that desirable lacy, delicate texture rather than a thicker, stodgier result.
- A very hot, properly prepared pan is non-negotiable. It instantly seals the batter, preventing it from sticking and creating that beautiful, mottled golden-brown surface.
Ingredients
- 110g plain flour
- A pinch of salt
- 2 large eggs
- 200ml semi-skimmed or whole milk, mixed with 75ml water
- 50g butter, for frying
- For serving: Caster sugar and fresh lemons
Equipment Needed
Large mixing bowl · Flour sieve · Balloon whisk · Measuring jug · 18-20cm non-stick frying pan (heavy-based is best) · Ladle · Palette knife or fish slice · Kitchen paper
Step-by-Step Instructions
- First, sift the plain flour and salt into a large mixing bowl. Hold the sieve high to give the flour a good airing. Make a well in the centre of the flour with the back of a spoon.
- Break the two eggs into the well. Now, take a whisk (a balloon whisk is best) and begin to whisk the eggs. Don't worry about the flour just yet.
- Gradually, begin to incorporate the flour from the sides of the well. As the batter starts to thicken, begin to add the milk and water mixture a little at a time, continuing to whisk, drawing in more flour as you go. This gradual process is the key to a lump-free batter.
- Once all the liquid is incorporated and the batter is smooth (it should have the consistency of single cream), it is absolutely vital to let it rest. Cover the bowl with a tea towel and leave it on the worktop for at least 30 minutes.
- When you're ready to cook, place a good, heavy-based non-stick frying pan (about 18-20cm in diameter is ideal) over a medium-high heat. Add a small knob of butter and swirl it around to coat the base. Once it’s melted and sizzling, pour any excess into a small bowl to use between pancakes.
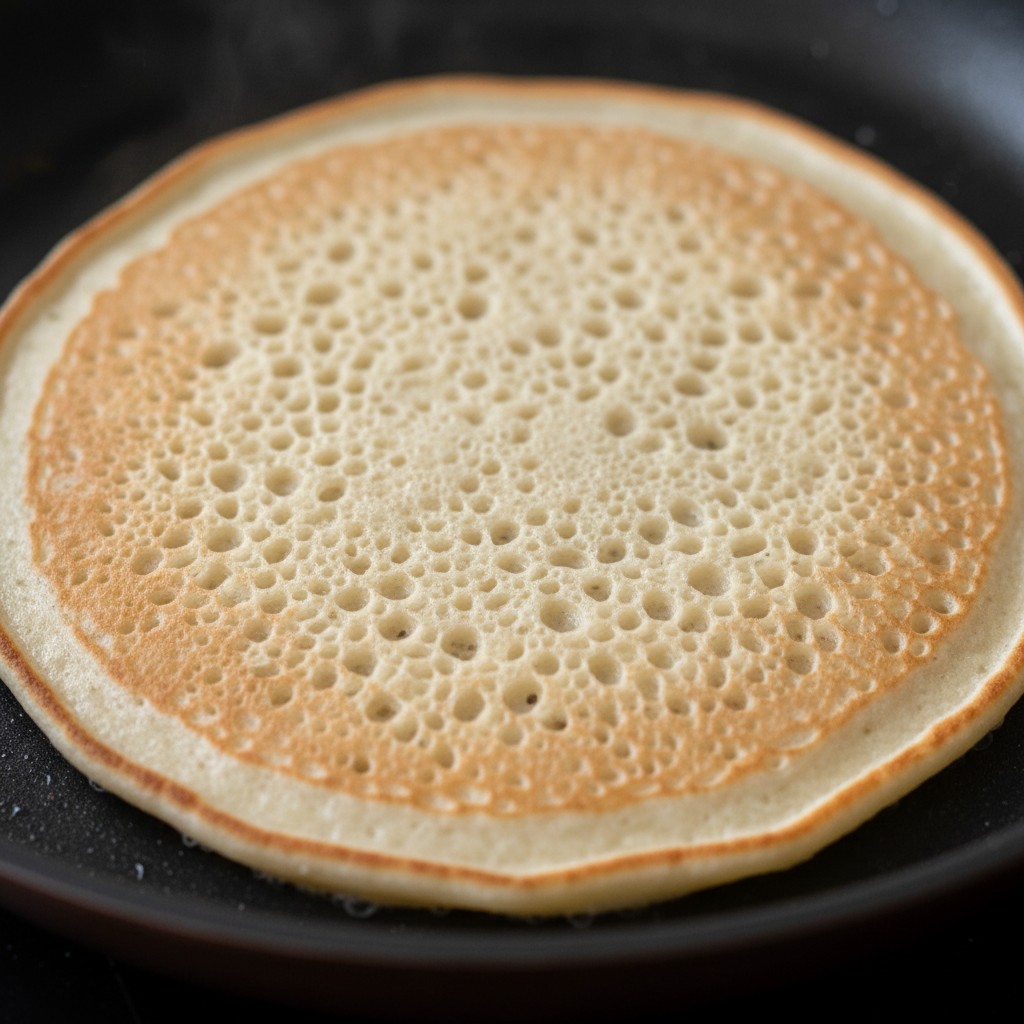
- The pan must be very hot. Ladle in just enough batter to thinly coat the base – about 2-3 tablespoons. Immediately tilt and swirl the pan so the batter runs to the edges, forming a thin, even circle.
- Cook the pancake for about 45-60 seconds on the first side, or until the underside is golden brown and the edges are starting to look crispy and lift away from the pan. You can lift an edge with a palette knife to check.
- Now for the flip. You can either be brave and toss it, or simply use a palette knife or fish slice to turn it over. Cook for another 30-45 seconds on the other side until it's also golden.
- Slide the cooked pancake onto a warm plate. Serve immediately, sprinkled with caster sugar and a generous squeeze of lemon juice, or stack them between sheets of baking parchment to keep them warm while you cook the rest.
- Before cooking the next pancake, wipe the pan with kitchen paper and add a tiny bit more butter from your bowl. Repeat until all the batter is used up.
Delia's Notes from the Kitchen
A note on pans: Your relationship with your pancake pan is a personal one. A good, heavy-based non-stick pan is your greatest ally here. It distributes heat evenly and prevents sticking. Once you have a pan that works, treasure it and, if possible, use it only for pancakes and omelettes. And please, do not be afraid of the first pancake going wrong. It is an almost sacred tradition that the first one is a trial run. The pan is learning, and so are you. By the third pancake, you will have found your rhythm.
How to Store & Reheat
To store, allow the pancakes to cool completely. Stack them with a sheet of baking parchment or greaseproof paper between each one to prevent sticking. Wrap the stack in cling film or place in an airtight container and store in the fridge for up to 3 days. To reheat, you can either place them back in a dry, hot pan for 30 seconds on each side, or microwave one or two at a time for 15-20 seconds until warm.
Frequently Asked Questions
Why does my pancake batter have lumps?
This almost always happens when the liquid is added to the flour too quickly. To avoid this, make a well in the flour, whisk the eggs in the centre first, and then incorporate the milk and water mixture very gradually while continuously whisking.
Is it really necessary to rest the batter?
Yes, it is one of the most important steps. Resting allows the gluten in the flour to relax and the starch granules to absorb the liquid. This makes for a much lighter, tender, and more delicate pancake and prevents that raw, 'floury' taste.
Can I use self-raising flour instead of plain flour?
I would strongly advise against it for this recipe. Self-raising flour contains raising agents that will make the pancakes thick and fluffy, like an American-style pancake. For a traditional British crêpe-style pancake, you must use plain flour.
Why did my first pancake always stick and tear?
This is a common experience! It's often because the pan wasn't quite hot enough when the batter went in, or there wasn't quite enough butter. Don't be discouraged; consider the first pancake a test for the pan's temperature. It's the cook's perk!
Can I freeze pancakes?
Yes, they freeze beautifully. Cool them completely, then stack them with a sheet of baking parchment between each one. Place the stack in a freezer bag, remove as much air as possible, and freeze for up to 3 months. Defrost at room temperature before reheating.